
EVAP Smoke Test: Start With the Gas Cap, When to Call the Shop
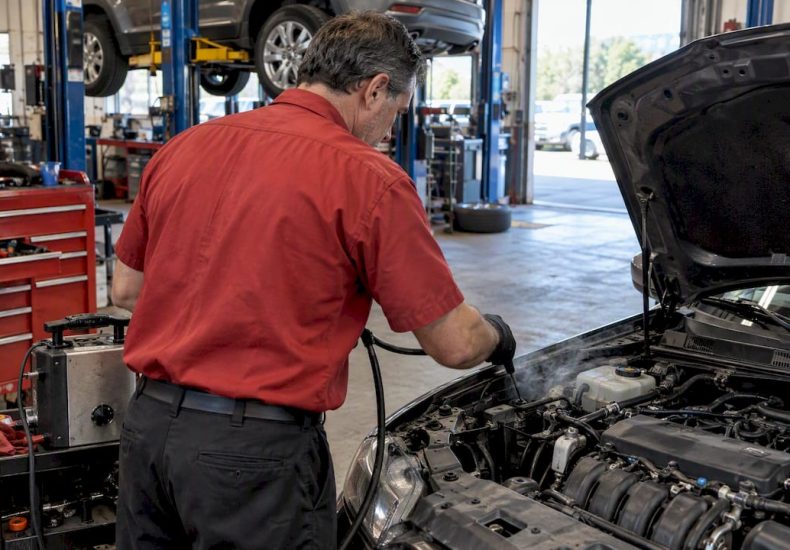
An EVAP smoke test fills your vehicle’s sealed evaporative emissions system with low-pressure smoke so a technician can watch for the exact spot where vapor escapes. If your check engine light is on with an EVAP-related code, start with a gas cap check before booking a test, since a loose or cracked cap is a frequent cause. When smoke testing is needed, it should always use regulated low-pressure equipment and a fully sealed system.
TL;DR:
- A smoke test uses regulated low-pressure equipment to detect leaks in the EVAP system because unsealed hoses or valves can cause false negatives.
- Most leaks are caused by simple issues like a loose gas cap or cracked hoses, which should be checked before conducting a smoke test to save costs.
- Conducting the test requires careful setup, including sealing the system, controlling pressure, and using UV dye for small leaks, taking about 15 to 60 minutes.
- Smoke escaping from a hose or valve indicates a large leak, while no visible smoke but a flow increase suggests a small or hidden leak needing further inspection.
- Repair costs vary from inexpensive fixes like a gas cap replacement to more costly component replacements, with professional tests costing between $45 and $130.
Table of Contents
- How an EVAP smoke test works
- When to use a smoke test and what to check first
- Tools, safety, and prep before you run a smoke test
- Running the smoke test step by step
- Reading the results without guessing
- Where leaks hide and what repairs typically cost
- When to DIY and when to bring it to a shop
- What we’ve learned running these tests in the shop
- Book an EVAP smoke test with Tom’s B & M Auto
- Sources
- FAQ
How an EVAP smoke test works
The evaporative emissions system is designed to trap fuel vapor instead of letting it escape into the air, and it only works when every seam, hose, and valve stays sealed. A smoke test exploits that design: technicians pump a visible, low-pressure smoke into the sealed system, then watch for where it leaks out. Sealing the system first matters because any open path, like an uncapped vent valve, lets the smoke drift away without ever building pressure at the leak.
Several OBD-II codes typically trigger this kind of testing:
- P0440: a general EVAP system malfunction with no specific fault identified.
- P0442: a small leak detected somewhere in the system.
- P0445: an issue with the purge control valve circuit.
- P0446: a problem with the vent control circuit.
Technicians use regulated smoke equipment set to roughly 0.5 to 1 PSI, which mimics the pressure the EVAP system actually sees in operation. That low ceiling keeps the smoke from stressing hoses, gaskets, or the charcoal canister the way a shop air compressor could.
When to use a smoke test and what to check first
A smoke test is rarely the first move, and jumping straight to it wastes both time and money when a simpler fix would have solved the problem. The common causes behind an EVAP-related check engine light often turn out to be something you can spot without any equipment at all.
- Confirm the code with an OBD-II scanner and write down whether it is P0440, P0442, P0445, or P0446.
- Inspect the gas cap for cracks, a worn seal, or a loose fit, and replace it if anything looks off.
- Do a visual hose check along the filler neck and engine bay for cracked or disconnected vapor lines.
- Test the purge and vent solenoids for proper electrical function using a scanner with bidirectional control.
- Run a smoke test only after the steps above haven’t resolved the code or found an obvious fault.
Skipping to a smoke test, or worse, skipping straight to replacing the canister or a solenoid, tends to produce wasted parts and repeat visits when the real fault was a $10 gas cap.
Tools, safety, and prep before you run a smoke test
Running a smoke test properly takes more than a can of smoke and a hose; our technicians follow detailed automotive insights and workflows to ensure accurate diagnostics and repair planning. Getting reliable results, and avoiding damage to the vehicle, depends on using the right equipment and following a few safety basics.
- Regulated EVAP-capable smoke machine: delivers smoke at a controlled low pressure instead of raw shop air.
- Flow meter: measures how much smoke is escaping so you can gauge leak size, not just spot it.
- Test-port or filler-cap adapters: let you introduce smoke without cutting into hoses.
- UV dye and UV light (optional): help locate leaks too small to see with smoke alone.
- OBD-II scanner with bidirectional control: lets you command the vent valve closed electronically.
Pressure control is not optional. Regulated EVAP mode should stay around 0.5 to 1 PSI, and unregulated shop air, which can run well above that, risks blowing seals or damaging the canister. Before starting, park somewhere out of direct wind and harsh light so smoke and any dye fluorescence are easier to see, keep the machine’s smoke fluid topped off, wear safety glasses, and confirm ahead of time how you’ll close the vent valve, either through the scanner or a fused jumper wire.
Pro Tip: Test on a day with little to no wind. Even a light breeze can scatter smoke before you spot where it’s escaping.
Running the smoke test step by step
Before touching anything, confirm and write down the exact OBD-II codes present. Do not clear them yet. Clearing codes before testing erases the freeze-frame data that can help confirm whether a repair actually fixed the problem.
- Locate an access point: most vehicles have a factory EVAP service port, though some setups require introducing smoke through the purge solenoid inlet or a filler-cap adapter instead.
- Attach the adapter securely so no smoke escapes at the connection itself.
- Leave the vent valve open initially and watch for smoke to exit there, confirming the machine’s output is reaching the system.
- Close the vent valve using the scanner’s bidirectional controls or a fused jumper, sealing the system so pressure can build.
- Introduce smoke at low, regulated pressure and give the flow meter time to stabilize before drawing conclusions.
- Inspect key points for escaping smoke: the gas cap, filler neck, vapor hoses, purge and vent valves, the charcoal canister, and tank seams.
- Switch to UV dye and a UV light if no smoke is visible but the flow meter still shows movement, since some leaks are too small for smoke alone to reveal.
Professional smoke machines pair with a flow meter that shows reference points, often around small leak size reference points equivalent to a few thousandths of an inch, which technicians use to quantify how large a leak actually is rather than just confirming one exists. A leak that only registers at the smallest reference point might not need immediate repair, while one that moves the needle toward the largest reference point points to a real vapor loss that will keep triggering codes.
A full test, done correctly, typically takes between 15 and 60 minutes, depending on how quickly the leak shows itself and how long sealing the system takes on that particular vehicle.
Reading the results without guessing
Visible smoke escaping from a hose, seam, or valve almost always points to a larger leak, the kind that’s straightforward to locate and fix once you’ve found it. A flow meter that keeps climbing with no visible smoke anywhere tells a different story: a small leak that needs UV dye or a more sensitive inspection to pin down.
- Smoke from the purge valve while it’s commanded closed suggests the valve itself isn’t sealing, or a connection near it has failed.
- No smoke anywhere and no flow reading almost always means the vent valve was never actually closed, so the system never pressurized.
- Intermittent codes that don’t reproduce during testing may point to a leak that only appears under vacuum, not static pressure.
- A gas cap that seems fine but the code persists can indicate a leak that only shows up when the system pulls vacuum rather than when it’s pressurized.
Some leaks genuinely need more than a single smoke pass to confirm. Vacuum-only leaks and highly sensitive systems, including newer natural vacuum leak detection setups, sometimes call for a pressure decay test or isolating individual components to catch a fault that pressurized smoke alone won’t reveal.
Where leaks hide and what repairs typically cost
Most EVAP leaks turn out to be one of a handful of usual suspects, and the fix scales with how serious the failure is.
- Gas cap or filler-neck seal: usually the cheapest and fastest fix, often solving the problem outright.
- Vapor hoses and clamps: inexpensive parts with short labor time once the leak point is identified.
- Purge or vent solenoids, or the canister itself: moderate cost, since these sometimes require full component replacement rather than a simple reseal.
- Tank or hard-line damage: the most expensive category, often requiring a lift and careful fuel-handling procedures that go beyond a driveway repair.
For more detail on how these repairs typically break down, it helps to compare against other common leak repairs, like a valve cover gasket leak, where cost also scales sharply with how far the damage has spread. Smoke testing itself typically runs $45 to $130 depending on the shop, and the actual repair cost afterward depends entirely on which component turns out to be at fault.
When to DIY and when to bring it to a shop
A confident DIYer with the right equipment can handle a fair amount of this work. Swapping a worn gas cap, replacing an obviously cracked hose, or running a basic smoke observation with a regulated machine are all reasonable weekend projects if you already own the gear.
- Call a shop when you need to command the vent valve closed electronically and don’t have bidirectional scan tool access.
- Call a shop when the leak only shows up on a flow meter or under UV dye, since that level of detection usually requires professional equipment.
- Call a shop when you’re not confident handling fuel system components safely, particularly near the tank or hard lines.
Pro Tip: If your smoke test shows nothing but the code keeps coming back, don’t start replacing parts. That pattern usually means the vent valve wasn’t sealed, not that there’s no leak.
Professional shops bring regulated machines, calibrated flow meters, and OBD-II diagnostics that go beyond a basic code reader, along with documented repairs and a warranty backing the work.
What we’ve learned running these tests in the shop
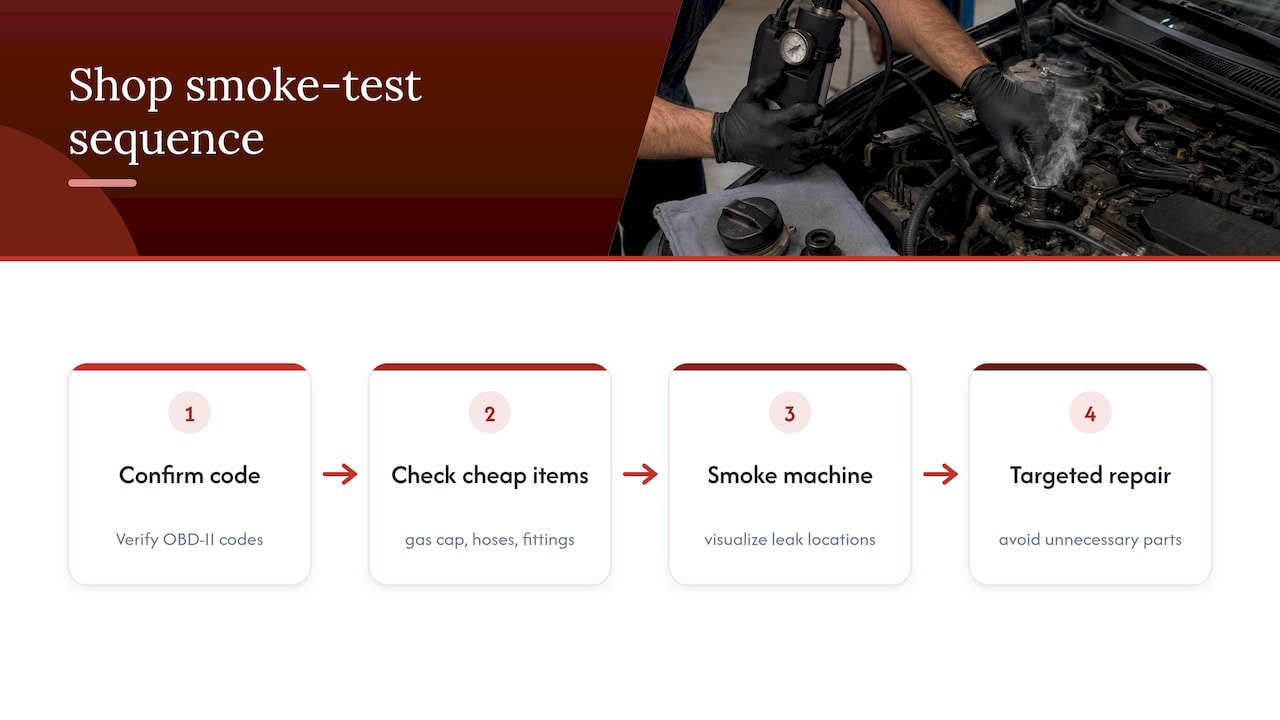
We run smoke tests the same way every time: confirm the code, check the cheap stuff first, and only pull out the smoke machine once the obvious causes are ruled out. That order exists because guessing at parts costs customers money without fixing anything, and visual confirmation from a smoke test tells you exactly where to spend the repair dollar instead of spending it three times.
Our experienced technicians run professional-grade OBD-II diagnostics on every EVAP complaint that comes through the bay. That combination of experience and equipment is what keeps a simple gas cap issue from turning into an unnecessary canister replacement.
— Shingi
Book an EVAP smoke test with Tom’s B & M Auto
Chasing an EVAP code on your own can eat up a weekend, while our shop runs the same regulated smoke test with calibrated flow meters and bidirectional diagnostics in a single visit. Repairs often come with a warranty to help ensure that issues don’t reoccur shortly after fixing.
We diagnose the code, seal and test the system properly, and walk you through exactly what we found before any repair work starts, with upfront pricing so there are no surprises on the invoice. If the issue turns out to be part of a broader service need, our 30k 60k 90k service appointment covers a full diagnostic check alongside routine maintenance. Reach out through our main service page to get an EVAP smoke test scheduled at our Lynnwood shop.
Sources
- Evaluating EVAP system leaks | AutoLine Pro
- Car smoke test cost: 2026 prices & average rates | TheCostGuys
- Driveability / EVAP diagnostics | Motor magazine
FAQ
How much does it cost to do an EVAP smoke test?
Shop pricing for an EVAP smoke test commonly falls between $45 and $130, depending on the shop and region. Any additional repair cost depends on which component turns out to be leaking.
How long does an EVAP smoke test take?
A professional smoke test typically takes between 15 and 60 minutes to complete. The exact time depends on how quickly the vent valve seals and how fast the leak reveals itself.
How do you test EVAP with smoke?
A technician seals the EVAP system by closing the vent valve, then introduces low-pressure smoke through a service port or filler-cap adapter. Any smoke escaping at a hose, seam, or valve marks the leak location, while a flow meter can catch leaks too small to see.
How can you tell if your EVAP system is bad?
A check engine light with codes like P0440, P0442, P0445, or P0446 is the most common sign of an EVAP fault. Other clues include a fuel smell near the vehicle or a gas cap that doesn’t click or seal properly, both worth checking before scheduling a smoke test.
Recommended
- Most EVAP Leaks Fix for $5–$15, Symptoms and Shop Steps for Drivers
- Check Engine Sign in Car: What to Do Right Now
- What Automobile Emissions Are and How Much Cars Actually Pollute
Leave a Reply