
How to Inspect Brake Pads at Home: A Safe Guide
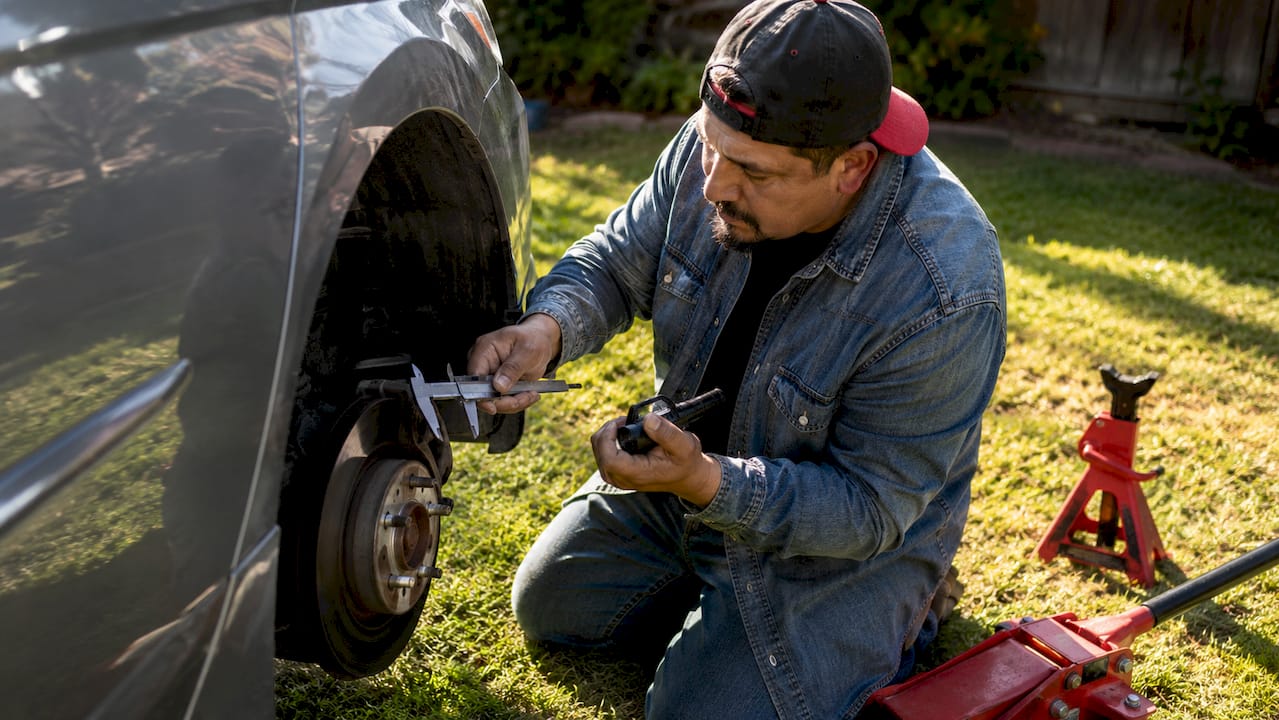
Inspecting brake pads at home is the process of visually assessing the thickness and condition of the brake pad friction material to confirm safe braking performance. The industry standard term for this process is a brake pad inspection, and every car owner can perform a basic version with common tools. New brake pads measure 10–12mm thick; plan replacement at 4–5mm and treat 3mm as the mandatory replacement threshold. Catching worn pads early protects your rotors, your wallet, and everyone in the vehicle.
What tools and safety equipment do you need?
A successful brake pad inspection at home starts with the right gear. You do not need a professional lift or specialty shop tools. Most of what you need is already in a basic home garage.
Tools and equipment checklist:
- Flashlight or phone light for illuminating the caliper area through the wheel spokes
- Ruler, tape measure, or brake pad gauge to measure friction material thickness in millimeters
- Floor jack to lift the vehicle off the ground
- Jack stands (at least two) to support the vehicle safely once lifted
- Lug wrench or breaker bar to remove the wheel if needed
- Wheel chocks to block the tires that stay on the ground
- Nitrile gloves to protect your hands from brake dust and grease
- Safety glasses to shield your eyes when working near the wheel well
Always use jack stands on the vehicle’s frame or pinch welds. A floor jack alone can fail if a hydraulic seal gives out, and the vehicle will drop without warning. Jack stands eliminate that risk entirely.
Pro Tip: Park on a flat, solid concrete surface before lifting the vehicle. Asphalt can shift under jack stand weight, especially on warm days.
Optional but useful: a digital caliper (available at any hardware store) gives you a more accurate reading than a ruler when friction material is thin and every millimeter matters.
How to check brake pads through the wheel without removing it
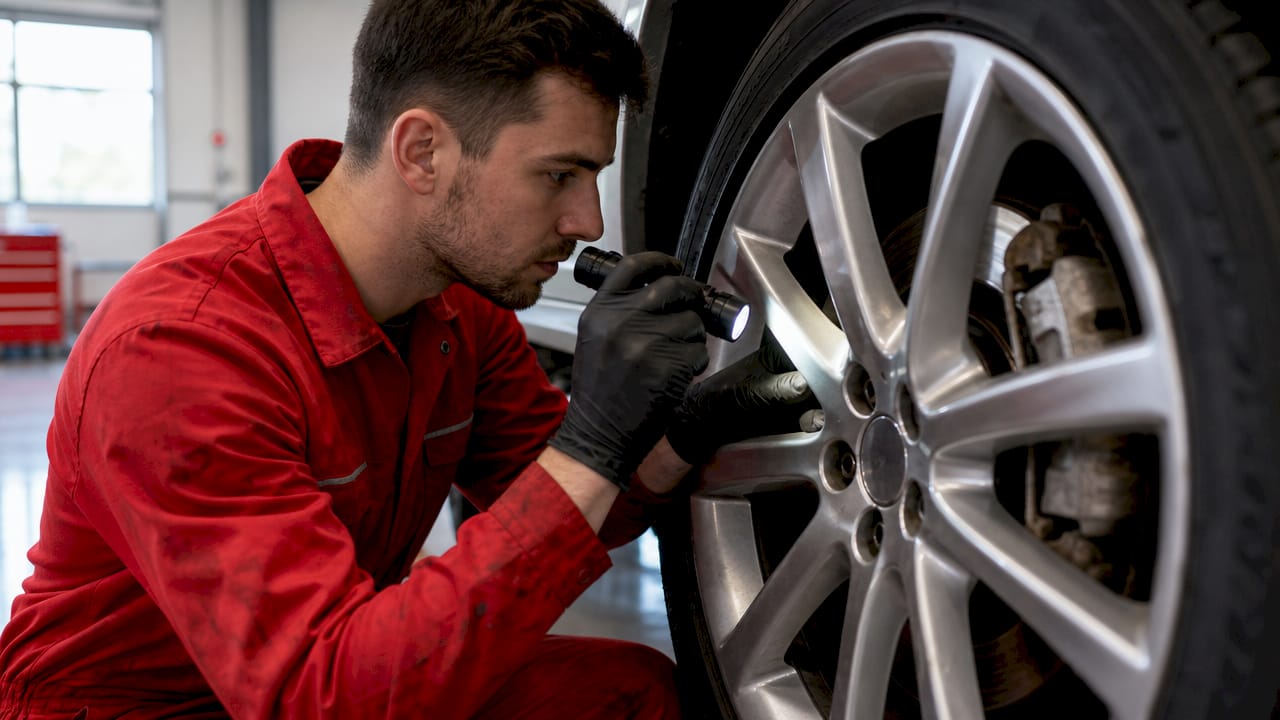
The quickest DIY brake pad evaluation requires no tools beyond a flashlight. This method works best on vehicles with open-spoke alloy wheels, where you have a clear line of sight to the brake caliper.
- Park and secure the vehicle. Turn off the engine, engage the parking brake, and place wheel chocks behind the rear tires if you are checking the front brakes.
- Turn the steering wheel. Rotate the wheel left or right to expose more of the caliper. This small adjustment dramatically improves your view of the pad through the spokes.
- Shine your light through the spokes. Aim the flashlight at the caliper. You will see the brake rotor (the large metal disc) and, pressed against it, the brake pad.
- Identify the friction material. The pad has two layers: a dark friction material on top and a steel backing plate below. The friction material is what wears down.
- Estimate the thickness. If the friction layer looks thinner than a pencil eraser (roughly 3mm), schedule a professional inspection immediately.
- Check both sides. Look at the outer pad through the spokes, then check the inner pad if your wheel design allows it.
Visibility through wheel spokes varies by wheel type. Steel wheels and wheels with hubcaps often block the caliper entirely, making this method unreliable. If you cannot clearly see the friction material, wheel removal is the only accurate next step.
Pro Tip: If your brakes have been squeaking recently, do not rely on the visual-through-wheel method alone. Squealing can mean the wear indicator tab is already contacting the rotor.
How to remove the wheel and measure brake pad thickness accurately
When the quick visual check is inconclusive, removing the wheel gives you a direct measurement. This is the standard method mechanics use, and you can replicate it at home with basic tools.
- Loosen the lug nuts first. With the vehicle still on the ground, break the lug nuts loose by about a half turn. Do not remove them yet. The vehicle’s weight keeps the wheel from spinning while you apply torque.
- Lift and support the vehicle. Position the floor jack under the manufacturer-specified jack point (check your owner’s manual). Raise the vehicle, then place jack stands under the frame. Lower the jack until the vehicle rests on the stands.
- Remove the wheel. Finish removing the lug nuts and pull the wheel straight off. Set it flat on the ground nearby.
- Locate the brake pad. With the wheel off, the caliper is fully exposed. The brake pad sits inside the caliper, pressed against the rotor face.
- Measure the friction material. Use a ruler or digital caliper to measure only the dark friction layer, not the full pad assembly. The steel backing plate is approximately 5mm thick. Subtract that from your total measurement to get the true friction material thickness.
- Check both the inner and outer pads. The inner pad (facing the vehicle) and the outer pad (facing the wheel) wear at different rates depending on caliper condition. Inspect both pads and note any significant thickness difference between them.
- Reinstall the wheel. Hand-tighten the lug nuts in a star pattern, lower the vehicle off the jack stands, then torque the lug nuts to your vehicle’s specification.
Brake pad thickness reference
| Thickness | Condition | Action |
|---|---|---|
| 10–12mm | New | No action needed |
| 4–5mm | Moderate wear | Plan replacement soon |
| 3mm | Minimum safe limit | Replace immediately |
| 1.5mm or less | Dangerously worn | Do not drive; replace now |
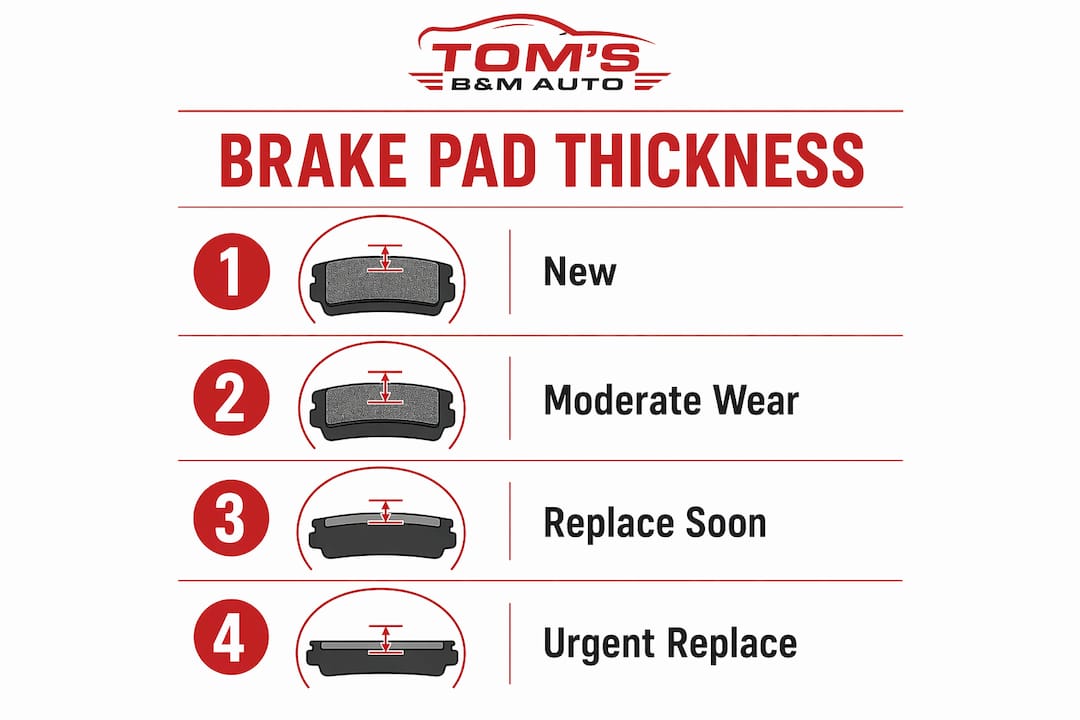
Pro Tip: Measure at the thinnest point of the pad, not the center. Pads wear unevenly, and the edge closest to the rotor edge often shows the most wear.
What additional brake components should you inspect?
A thorough brake pad inspection guide covers more than just pad thickness. The rotor, caliper, and brake fluid reservoir each tell you something critical about the health of your entire brake system.
Rotor condition: Look at the rotor face for deep grooves (scoring), a raised lip around the outer edge, or a blue tint on the metal surface. Blueing, scoring, or a pronounced lip all indicate heat damage or excessive wear. A scored rotor accelerates pad wear and reduces stopping power, even with new pads installed.
Caliper function: The caliper piston pushes the pad against the rotor every time you brake. A caliper that sticks or moves unevenly destroys pads quickly. Check the rubber boot around the piston for cracks or tears. A damaged boot lets moisture and debris contaminate the piston, causing it to seize. For a deeper look at how calipers affect safety, the role of brake calipers is worth understanding before your next inspection.
Uneven pad wear: Uneven wear between inner and outer pads signals a mechanical problem, not just normal use. Frozen slide pins or a sticking caliper piston are the most common causes. Replacing pads without fixing the underlying issue means the new pads will wear out just as unevenly.
Brake fluid level: Open the hood and check the brake fluid reservoir on the master cylinder. A drop in fluid level without any visible leak often means the caliper pistons have extended far to compensate for thin pads. This is a hidden wear indicator most car owners miss entirely.
Pro Tip: If the fluid level is low and you cannot find a leak, check your pads before adding fluid. Topping off the reservoir with worn pads can cause overflow when new, thicker pads push the pistons back in.
Quick reference: what to look for beyond the pads
| Component | Warning Sign | Likely Cause |
|---|---|---|
| Rotor | Scoring, blueing, or lip | Heat damage or severe wear |
| Caliper | Torn boot, sticky piston | Moisture contamination or corrosion |
| Pad wear pattern | Inner much thinner than outer | Frozen slide pin or sticking piston |
| Brake fluid | Low without visible leak | Worn pads extending caliper pistons |
Common mistakes to avoid when checking brake pads at home
Even careful car owners make errors during a DIY brake pad evaluation. Knowing these pitfalls in advance saves you from a false sense of security.
- Measuring the full pad instead of just the friction material. The steel backing plate adds roughly 5mm to your measurement. If you measure the whole assembly and read 6mm, your actual friction material may only be 1mm. That vehicle is not safe to drive.
- Skipping the inner pad. Floating caliper designs apply more pressure to the inner pad, so it wears faster. Checking only the outer pad and declaring the brakes fine is a common and dangerous mistake.
- Trusting squealing sounds as your only signal. Audible wear indicators are useful but unreliable as a sole diagnostic. Grinding sounds mean the pad is gone and the metal backing plate is contacting the rotor. At that point, you need both new pads and new rotors.
- Supporting the vehicle on a jack alone. A floor jack is for lifting, not holding. Using it as a support while you work under or around the wheel is a serious safety risk.
- Ignoring the brake fluid check. Skipping the reservoir check means missing one of the clearest signs of advanced pad wear.
When your home inspection raises questions you cannot answer confidently, that is exactly the right moment to call a professional. A confirmed diagnosis from an ASE-certified technician costs far less than a brake failure.
Why I think most car owners wait too long
The biggest mistake I see is not a technical one. Car owners tend to wait for a symptom, whether it is a squeal, a pull, or a longer stopping distance, before they think about their brakes. By the time those symptoms appear, the pads are often already below the 3mm threshold, and the rotors may be damaged too.
Regular home checks, done every six months or at every oil change, catch wear before it becomes expensive. A five-minute look through your wheel spokes costs nothing. Replacing a rotor because you ignored a worn pad costs several times more than the pad replacement alone.
The other thing I have learned is that DIY inspection and professional service are not competing choices. They work together. You inspect at home to stay informed and catch problems early. You bring the vehicle to a shop like Tom’s B & M Auto when the measurement is borderline, the wear is uneven, or you find something you do not recognize. That combination gives you both confidence and safety.
Brake pads are not glamorous. Nobody talks about them until something goes wrong. But they are the single most critical safety component between your vehicle and a collision. Treat them accordingly.
— Shingi
Tom’s B & M Auto offers professional brake inspections in Lynnwood
Tom’s B & M Auto has served Lynnwood drivers since 1985, and brake service is one of the most common reasons car owners come through the door. If your home inspection turns up thin pads, uneven wear, or a rotor you are not sure about, the ASE-certified technicians at Tom’s B & M Auto can confirm your findings and handle the repair the same day in most cases. Take advantage of the free brake inspection offer to get a professional set of eyes on your brake system at no cost. If repairs are needed, financing options are available so cost does not stand between you and safe brakes. All work comes with a 24-month / 24,000-mile warranty.
FAQ
How often should you inspect brake pads at home?
Check your brake pads every six months or at every oil change interval. More frequent checks make sense if you drive in stop-and-go traffic or mountainous terrain, where pads wear faster.
What is the minimum safe brake pad thickness?
Replacement is mandatory at 3mm of friction material remaining, and overdue at approximately 1.5mm. Plan your replacement when pads reach 4–5mm to avoid emergency situations.
Can you check brake pads without removing the wheel?
Yes, on vehicles with open-spoke alloy wheels, a flashlight through the spokes gives a usable estimate. Steel wheels or hubcaps often block the view, requiring wheel removal for an accurate reading.
What does uneven brake pad wear mean?
Uneven wear between the inner and outer pad signals a mechanical problem such as a frozen slide pin or sticking caliper piston. Replacing pads without fixing the root cause leads to rapid wear on the new pads.
Is a drop in brake fluid always a sign of worn pads?
A low brake fluid reservoir without any visible leak strongly suggests worn pads, since caliper pistons extend further as pads thin out, drawing fluid from the reservoir. Rule out a leak first, then check pad thickness.
Recommended
- What Is Brake Bleeding? A Car Owner’s Guide – Tom’s B & M Auto Blog
- Why Brakes Squeak: Causes, Fixes, and Warning Signs – Tom’s B & M Auto Blog
- The Role of Brake Caliper in Vehicle Safety – Tom’s B & M Auto Blog
- What Is a Brake Rotor? Function, Wear, and Care – Tom’s B & M Auto Blog
Leave a Reply