

Why Your Car Burns Oil: Causes, Checks, and Fixes
A car that “burns oil” is losing engine oil into the combustion chamber, where it gets consumed along with the fuel-air mixture. Left alone, it accelerates internal wear and can destroy your catalytic converter. Here’s what to do right now:
- Pull the dipstick and check your oil level. If you’re more than a quart low with no visible puddle under the car, oil burning is the likely culprit.
- Watch your tailpipe on a cold start. A puff of blue-gray smoke that lingers or reappears under acceleration is the clearest visual sign.
- Limit driving if oil loss is rapid. Losing oil rapidly means the engine is working without adequate lubrication.
Cost perspective before you panic: minor fixes like a PCV valve or valve cover gasket typically run under $150. Valve seal work lands in the $200–$800 range. Major engine work, including piston rings or a head gasket, can reach $2,000–$4,000 depending on your vehicle. An ASE-certified technician can tell you which end of that range you’re looking at after a proper diagnostic.
Table of Contents
- Why a car burns oil: the mechanical pathways
- How to spot oil burning and run simple checks at home
- What a mechanic will test and why
- How serious is oil burning, and when should you worry?
- Repair options and what they typically cost in the U.S.
- How to reduce the risk of oil burning
- Can you keep driving? Short-term guidance
- Technician tips and monitoring your consumption
- Key Takeaways
- The case for a phased diagnostic approach
- Tom’s B & M Auto: diagnostics and engine repair in Lynnwood, WA
- Useful sources
Why a car burns oil: the mechanical pathways
Oil enters the combustion chamber through a handful of specific failure points. Knowing which one applies to your car shapes every decision that follows.
-
Stuck or faulty PCV system. The positive crankcase ventilation (PCV) valve routes blow-by gases from the crankcase back into the intake. When it clogs, crankcase pressure builds and pushes oil past seals and into the combustion chamber. A faulty PCV valve is one of the most common and least expensive causes of oil consumption, with fixes typically running $20–$120.
-
Worn valve stem seals or guides. Valve seals keep oil from dripping down the valve stems into the combustion chamber. When they harden or crack, oil seeps in, especially after the engine sits overnight. Worn valve guides compound the problem by letting the valve wobble, widening the gap the seal has to cover.
-
Worn or failed piston rings. Oil control rings scrape oil off the cylinder walls on every stroke. As they wear, oil clings to the walls and burns. Worn piston rings typically show up as persistent blue smoke under acceleration and low compression readings, and repairs frequently run into the thousands.
-
Turbocharger seal failure. Turbos use engine oil to lubricate their bearings. Worn seals let that oil migrate into the intake (compressor side) or exhaust (turbine side), where it burns. You may also find oily residue inside the intercooler piping on turbocharged cars.
-
Head gasket failure. A blown or seeping head gasket can allow oil to enter combustion chambers or coolant passages. This often comes with white smoke, a sweet coolant smell, or milky oil on the dipstick alongside the oil consumption.
-
Oil overfill or wrong viscosity. Overfilling pushes oil past seals that are otherwise fine. Using oil that’s too thin for your engine’s tolerances lets it slip past rings and seals more easily. Always match the viscosity on the oil cap or in your owner’s manual.
Pro Tip: Before booking any teardown, check your PCV valve and verify your oil level and viscosity. These two checks cost almost nothing and rule out the most common inexpensive causes first.
How to spot oil burning and run simple checks at home
You don’t need a lift or a scan tool to gather useful evidence. These symptoms and checks can tell you a lot before you ever call a shop.
Symptoms to watch for:
- Blue exhaust smoke on cold start — a classic sign of worn valve seals, which let oil pool in the combustion chamber while the engine sits
- Blue smoke under acceleration — points more toward worn oil control rings or turbo seal failure
- Dipstick level dropping with no driveway stains — oil is being consumed internally, not leaking externally; check our guide on external oil leaks to confirm the difference
- Burning oil smell from the cabin vents or around the engine bay
- Fouled or oily spark plugs — oil-coated plugs can also cause misfires; if you’re seeing rough running alongside oil loss, that combination narrows the diagnosis quickly
- Oily residue in intercooler piping on turbocharged vehicles
Owner checklist:
- Pull the dipstick, wipe it clean, reinsert fully, then pull again. Note the level and write it down with your mileage.
- Check the ground under the car after it’s been parked overnight. No puddle with a dropping dipstick level points to internal consumption.
- On a cold start, stand behind the car and watch the exhaust for the first moments. Blue smoke that clears quickly suggests valve seals; smoke that persists or returns under throttle suggests rings or turbo.
- If you’re comfortable doing it, pull one or two spark plugs. Wet, oily, or black-sooty plugs on specific cylinders help localize the problem.
Smoke color quick reference:
| Smoke color | What it typically means |
|---|---|
| Blue or blue-gray | Oil burning in the combustion chamber |
| White (thick, sweet-smelling) | Coolant entering combustion — possible head gasket |
| Black | Rich fuel mixture — not an oil issue |
| Light white (cold morning) | Normal condensation, clears quickly |
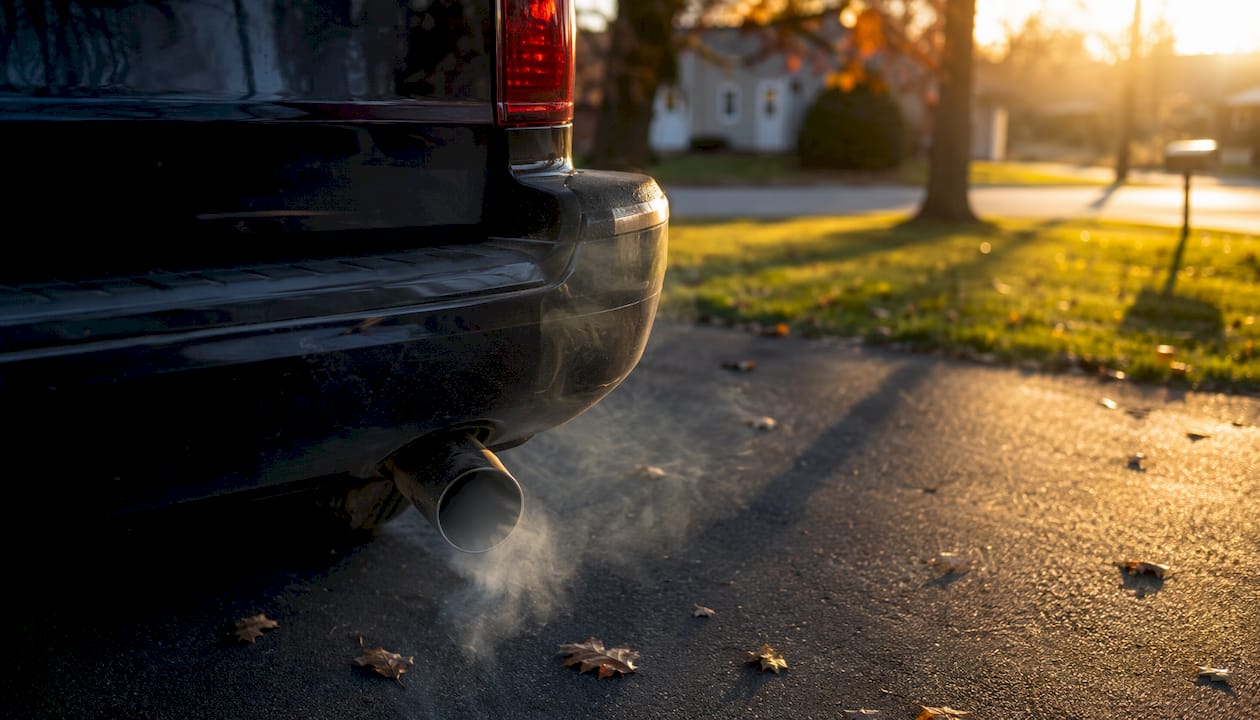
Normal oil consumption in a healthy engine runs roughly 0.2–0.3 quart per 1,000 miles. Anything beyond that warrants tracking and investigation.
What a mechanic will test and why
A good shop doesn’t guess. They follow a diagnostic sequence that starts cheap and invasive only when the evidence demands it.
-
Visual inspection. The technician checks for external leaks, oil residue on the exhaust manifold, valve cover gasket seepage, and any obvious PCV hose cracks or disconnections.
-
PCV and intake check. The PCV valve is removed with the engine running. A strong vacuum pull confirms it’s working. No vacuum means the system is clogged and needs cleaning or replacement before anything else is torn apart.
-
Spark plug inspection. Pulling the plugs reveals which cylinders are affected. Oily deposits on plug 3 but not the others, for example, can point to a localized valve seal or ring issue on that cylinder.
-
Compression test. Each cylinder is tested for compression. Low compression in one or more cylinders flags a sealing problem, but doesn’t yet tell you whether rings or valves are the cause.
-
Wet leak-down test. A small amount of oil is added to a low-compression cylinder and the test is repeated. Compression that improves with oil added points directly to worn rings rather than valve issues, because the oil temporarily fills the gap the rings can’t seal.
-
Borescope inspection. A small camera is inserted through the spark plug hole to visually inspect cylinder walls for scoring, carbon buildup, or ring damage. This is the clearest way to confirm ring or cylinder wall wear without pulling the engine apart.
-
Turbo inspection (turbocharged vehicles). The technician checks for oil in the intercooler, inspects turbo shaft play, and looks for seal leakage on both the compressor and turbine sides.
Pro Tip: Ask your shop to follow a phased diagnostic approach: PCV and visual checks first, then compression and leak-down, then borescope only if needed. Each phase costs less than a teardown, and most oil-burning cases are resolved before the engine ever comes apart.
How serious is oil burning, and when should you worry?

The answer depends on how fast you’re losing oil and what else is happening.
Consistent oil loss left unaddressed leads to internal engine damage and can harm emission-control components, including the catalytic converter, which may require expensive secondary repair.
Stop driving or seek immediate service if:
- You’re losing more than roughly 1 quart per 500 miles
- The oil pressure warning light comes on
- Blue smoke is persistent and heavy, not just a brief puff at startup
- The engine is running rough or misfiring alongside oil loss
- You smell burning oil strongly from inside the cabin
Moderate concern (monitor closely and book a shop soon):
- Dipstick drops noticeably between oil changes but no warning lights appear
- Occasional blue puff at cold start that clears quickly
- Mild oil smell after hard driving
Manufacturer tolerances vary widely — some OEM documentation allows up to a quart per 1,000–2,000 miles and still considers it within spec. That’s why tracking your own baseline matters more than comparing to a neighbor’s car.
Repair options and what they typically cost in the U.S.
Here’s a realistic look at the repair ladder, from least to most invasive:
| Repair | What’s involved | Typical U.S. cost range |
|---|---|---|
| PCV valve and hoses | Replace valve and inspect/replace hoses | $20–$120 |
| Valve cover gasket | Remove cover, replace gasket and seals | — |
| Valve stem seals | Reseal valve stems; heads stay on in many cases | $200–$800 |
| Valve guides | Machine shop work; heads must come off | $500–$1,500+ |
| Head gasket replacement | Major teardown; includes resurfacing | $1,000+ |
| Turbo repair or replacement | Rebuild or replace turbocharger unit | $500+ |
| Piston rings / engine rebuild | Full teardown; most expensive option | $2,000–$4,000+ |
| High-mileage oil or seal conditioner | Fluid swap only; no mechanical repair | $30 per oil change |
Repair path guidance:
- Start with PCV and valve cover gasket work. These are the cheapest fixes and rule out the most common causes.
- If those don’t resolve it, move to valve stem seals. Many shops can do this without pulling the heads on overhead-cam engines.
- Compression and leak-down results determine whether you’re looking at valve guides or rings. If rings are confirmed, you’re in rebuild territory.
- High-mileage oil formulations can reduce consumption by an estimated 20–30% in some engines by conditioning seals, but they won’t fix worn rings. Use them as a stopgap while you plan the proper repair, not as a substitute for it.
For high-mileage vehicles, switching to a high-mileage oil formula is a reasonable first step before committing to expensive mechanical work.
How to reduce the risk of oil burning
Most oil consumption problems don’t appear overnight. They build up over time, and consistent maintenance habits slow that process significantly.
- Check your oil level every 1,000 miles or at every fuel fill-up if your car is older. Catching a slow drop early prevents the low-oil damage that accelerates wear.
- Follow the manufacturer’s oil weight and service interval. The spec on your oil cap exists for a reason. Using a thinner oil than specified increases the chance of it slipping past rings and seals.
- Replace the PCV valve on schedule. Most manufacturers recommend inspection every 20,000–50,000 miles. It’s a $10–$30 part that prevents far more expensive problems.
- Avoid chronic short-trip driving when possible. Frequent short trips prevent the engine from reaching full operating temperature, which promotes condensation and sludge that can clog PCV passages.
- Address overheating promptly. Sustained high heat degrades seals faster than almost anything else. If your temperature gauge is running high, that’s a separate problem worth fixing before it compounds into an oil-burning one.
- **On engines past 75,000 miles, consider switching to a high-mileage formulation with seal conditioners. These oils are designed to soften aging seals slightly, which can reduce minor seepage before it becomes a real consumption problem.
Pro Tip: Synthetic oil is more thermally stable than conventional, but on older engines with already-worn seals, it can expose leaks that thicker conventional oil was masking. If you switch to full synthetic on a high-mileage engine and suddenly notice more oil loss, a high-mileage blend with seal conditioners is often the better choice.
Can you keep driving? Short-term guidance
Whether it’s safe to keep driving depends on how much oil you’re losing and how fast.
- Top up the oil to the full mark before driving anywhere. Running even a quart low increases friction and heat. This is the single most important short-term step.
- Avoid hard acceleration, towing, or sustained highway speeds until the problem is diagnosed. High RPM and load increase oil consumption rates and put more stress on already-worn seals.
- Watch your gauges on every trip. If the oil pressure light comes on, pull over immediately and shut the engine off. Driving on low oil pressure can destroy bearings in minutes.
- Plan your route to the shop. If you need to drive the car to get it diagnosed, carry a quart of oil in the trunk, choose a shorter route, and avoid the freeway if possible.
- Do not drive if you’re losing more than roughly 1 quart per 500 miles, seeing persistent heavy blue smoke, or getting oil pressure warnings. At that rate, the risk of catastrophic engine damage outweighs the convenience of driving it in yourself. Arrange a tow.
Short trips to a nearby shop are generally fine if the oil level is topped up and no warning lights are active. The goal is to get a diagnosis before the problem gets worse, not to delay it until the engine fails.
Technician tips and monitoring your consumption
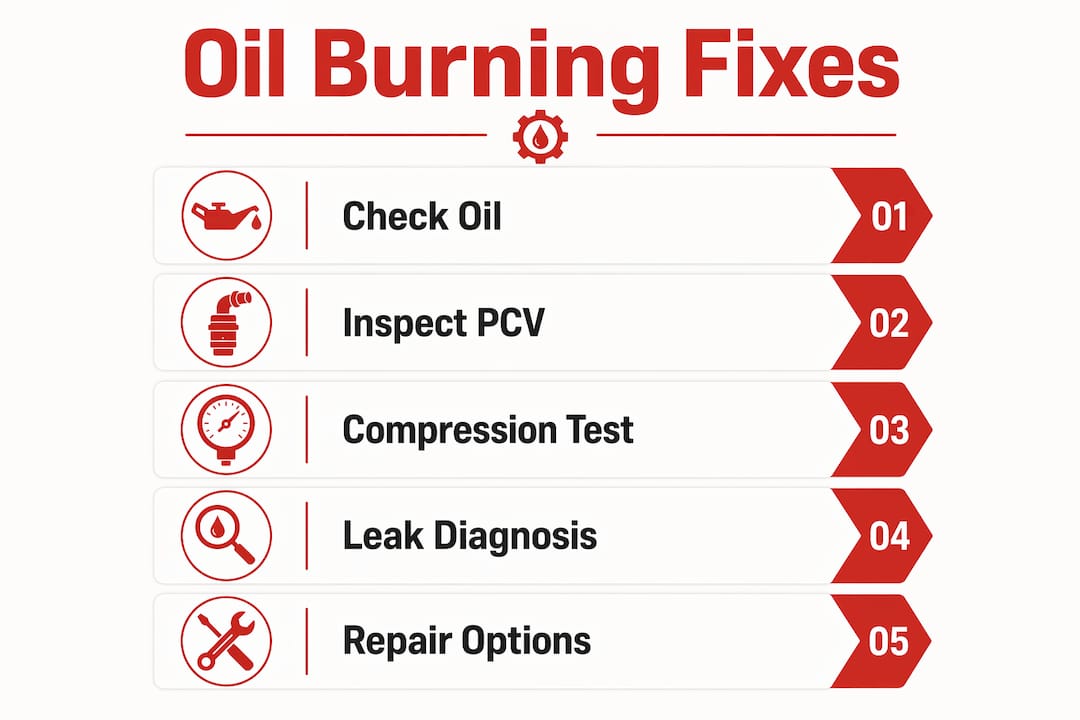
The most useful thing you can do between now and your shop visit is build a consumption log. It takes two minutes per fill-up and gives a technician real data to work with.
Consumption log template:
- Date and mileage each time you check the dipstick
- Amount of oil added (in quarts, to the nearest quarter)
- Miles driven since the last check
- Observations: smoke color, smell, rough running, warning lights
If you’re adding more than a quart every 1,000 miles consistently, bring that log to the shop. It tells the technician whether the problem is stable or worsening, which affects how urgently they’ll recommend a teardown.
On high-mileage oil: switch to it and give it two full oil-change intervals (roughly 5,000–10,000 miles) before judging the result. An estimated 20–30% reduction in consumption is realistic for engines where seal wear is the primary cause. If consumption doesn’t improve at all, the problem is mechanical, not a seal-conditioning issue.
Pro Tip: When booking a shop, ask specifically for ASE-certified technicians, a written estimate before any work begins, and a phased diagnostic approach. A shop that wants to pull the engine apart before running a compression test is skipping steps that could save you $1,000 or more.
For general vehicle care best practices between shop visits, resources like the AMB Pro Detailing blog cover inspection habits that help owners catch early warning signs before they become expensive repairs.
Key Takeaways
A car burning oil almost always traces back to one of a few mechanical failure points — and the right diagnostic sequence finds the cheapest fix first.
| Point | Details |
|---|---|
| Check oil and smoke first | Pull the dipstick and watch for blue exhaust smoke before assuming the worst. |
| PCV is the cheapest first check | A faulty PCV valve costs $20–$120 to fix and mimics far more serious internal wear. |
| Track your consumption baseline | Log oil added regularly; a rate higher than typical manufacturer tolerances warrants a shop visit. |
| Repair costs range widely | Minor fixes run under $150; piston ring or head gasket work can reach $2,000–$4,000. |
| Tom’s B & M Auto | ASE-certified technicians in Lynnwood, WA offer phased diagnostics and a 24-month/24,000-mile warranty on all work. |
The case for a phased diagnostic approach
Most oil-burning articles tell you to brace for a rebuild. That framing pushes owners toward expensive decisions before anyone has actually confirmed what’s wrong. The reality is that a meaningful percentage of oil-burning complaints resolve at the PCV valve or valve cover gasket stage, and you only find that out by starting there.
The shops that serve owners well are the ones that earn the right to go deeper. That means running a compression test before recommending a teardown, and running a leak-down test before recommending a rebuild. Written estimates at each phase, not after the engine is already apart, are what let owners make informed decisions rather than just approving whatever comes next.
There’s also a practical argument for getting a diagnosis sooner rather than later. A car losing oil slowly is manageable. A car that runs low on oil because the owner didn’t realize how fast it was dropping is a much more expensive problem. The catalytic converter damage alone from sustained oil burning can add hundreds of dollars to a repair that started as a $200 valve seal job.
Tom’s B & M Auto: diagnostics and engine repair in Lynnwood, WA
Burning oil is one of those problems where the right first step saves you from the most expensive last step. Tom’s B & M Auto has been handling exactly this kind of diagnosis for over 40 years in Lynnwood, WA, with ASE-certified technicians and a phased approach that starts with the inexpensive checks before recommending anything invasive.
On-site, the shop runs compression tests, leak-down tests, borescope inspections, PCV checks, and turbo inspections for forced-induction vehicles. If the diagnosis points to valve seal work, head gasket replacement, or engine repair, the team handles that too, backed by a 24-month/24,000-mile warranty on all work. For larger repairs, financing is available so cost doesn’t force you into a bad decision. Current promotions include $150 off any repair over $1,000.
Start with a free digital vehicle inspection — it’s the lowest-friction way to get a professional read on what’s actually happening before committing to any repair.
Useful sources
- AutoZone: Why Is My Car Burning Oil? — Practical breakdown of internal and external oil-burning causes with owner-level diagnostic steps.
- Engine Labs: Burning Oil — Why Engines Consume Their Own Oil — Technical deep-dive on PCV systems, ring tension, and oil volatility testing (NOACK/JASO GLV-2).
- Wheels Greed: Engine Oil Consumption — How Much Is Normal and When to Worry — Covers normal consumption baselines, high-mileage oil expectations, and when to escalate.
- Cars.com: How Much Oil Consumption Is Normal? — Explains manufacturer variance in acceptable consumption and why owners should track their own baseline.
- Capital One Auto Navigator: Why Is My Car Burning Oil? — Consumer-focused overview of risks, including catalytic converter damage from sustained oil burning.
- Valvoline Global: Understanding Excessive Oil Consumption — Manufacturer perspective on consumption thresholds and high-mileage oil formulations.
Owner’s manual reminder: Your vehicle’s manufacturer sets its own acceptable oil consumption range. Check your owner’s manual for the specific figure before assuming your car has a problem — or before assuming it doesn’t.
Recommended
- Why Your Car Leaks Oil: Causes, Risks, and Fixes – Tom’s B & M Auto Blog
- Why Transmission Slips: Causes, Symptoms, and Fixes – Tom’s B & M Auto Blog
- What Is Engine Misfiring? Causes, Signs, and Fixes – Tom’s B & M Auto Blog
- Fix Engine Misfires Step by Step: A Car Owner’s Guide – Tom’s B & M Auto Blog
Leave a Reply