
A Car Safety Inspection Checklist Every Driver Can Use
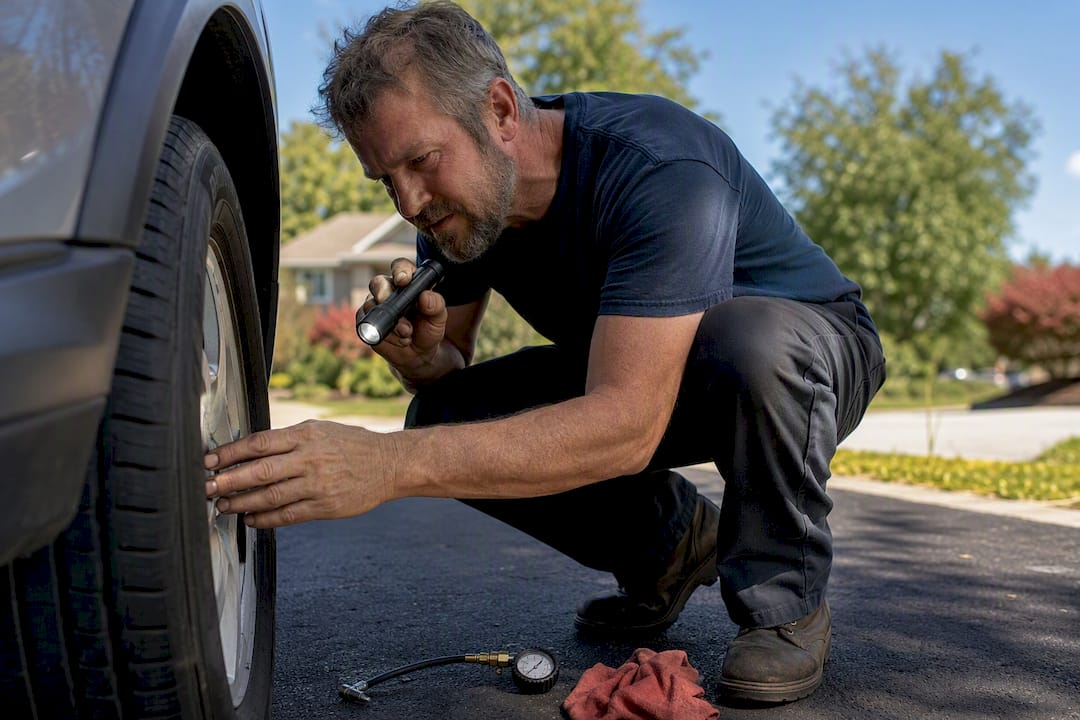
Run this system-by-system check and you’ll find most safety defects in 30 to 60 minutes, using nothing but a flashlight, a tire gauge, and 20 minutes of driveway time. A shorter version, covering the ten items most likely to cause a breakdown or a citation, takes under 10 minutes.
Print the full checklist below and keep it in the glove box. It won’t replace a state-mandated inspection, and it won’t catch what an OBD-II scan finds buried in the computer, but it will catch the things that actually strand people on the highway.
Before you do anything else, run these ten checks:
- Tire tread depth and visible sidewall damage
- Headlights, brake lights, and turn signals all functioning
- Brake pedal feel (firm, not spongy or sinking)
- Engine oil and coolant levels
- Battery terminals (clean, tight, no corrosion)
- Wiper blades clear the glass without streaking or chatter
- All seat belts latch and retract smoothly
- Horn works
- Mirrors are secure and properly angled
- No fresh fluid spots under the car overnight
If you find a failed brake pedal, loose steering, or a tire with cords showing, stop driving the vehicle. Call for a tow or get it to a shop like Tom’s B & M Auto rather than risking the drive. Everything else on this list can wait for a same-day appointment.
Key Takeaways
A car safety inspection checklist works only when it pairs visual, driveway-level checks with a professional diagnostic step for anything a flashlight can’t confirm.
| Point | Details |
|---|---|
| Run the quick check monthly | Ten items, under 10 minutes, catch most breakdown risks before they escalate. |
| Do the full checklist quarterly | System-by-system review every three months or at oil change intervals catches early wear. |
| Know your stop-driving triggers | Brake failure, major steering play, or a damaged tire means stop driving and get help immediately. |
| DIY checks and state inspections differ | Personal checklists catch early wear; licensed state inspections are required for registration in some states. |
| Book professional help for hidden issues | Tom’s B & M Auto offers free pre-trip checks and OBD-II diagnostics for anything beyond visual inspection. |
Table of Contents
- The Complete Car Safety Inspection Checklist by System
- How to Perform the Inspection Step by Step
- How Often You Should Run a Safety Inspection
- State Inspections vs. Your Personal Checklist
- What to Do When You Find a Safety Defect
- Free Pre-Trip Safety Checks and Repairs in Lynnwood
- Frequently Asked Questions
- Sources
The Complete Car Safety Inspection Checklist by System
A thorough inspection works best in a fixed order: walk around the outside, pop the hood, check the interior, then take it for a short drive. Technician-level guides like the CVSA’s inspection cheat sheet use measurable pass/fail cues rather than vague impressions, and that’s the model worth copying at home. “The tires look fine” isn’t a finding. “Tread depth reads 4/32 inch on the front, 3/32 on the rear” is.
Tires, wheels, and tread
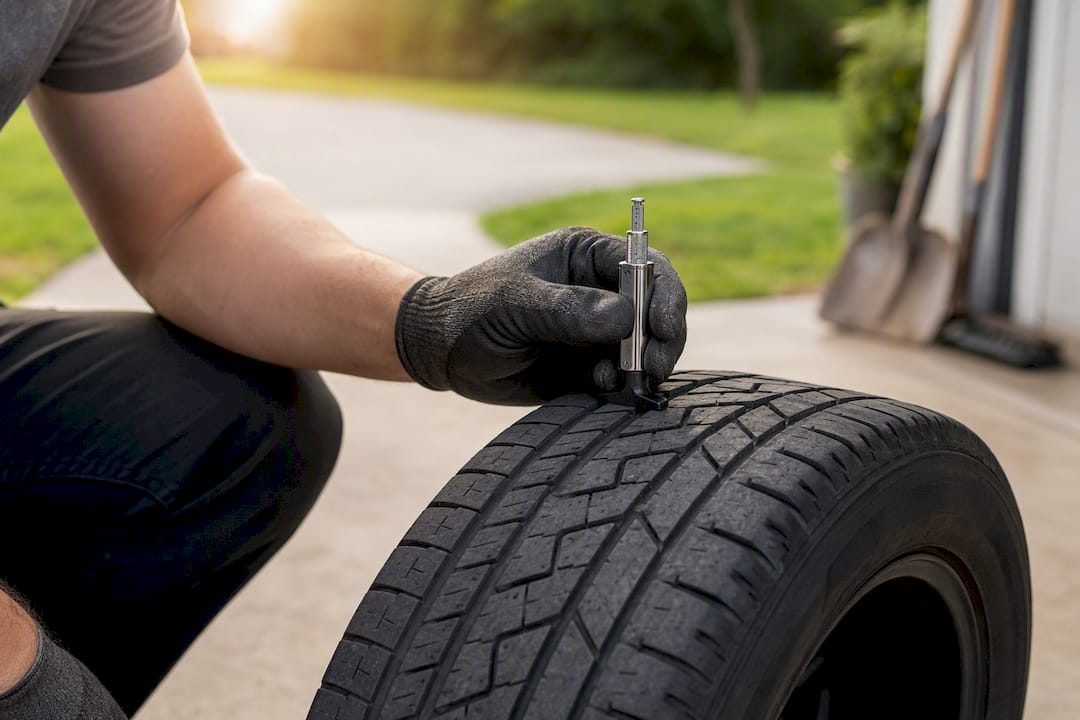
Tread depth below 2/32 inch is a legal and safety failure in most states, and you can check it with a $3 tread gauge or a penny (if you can see all of Lincoln’s head, replace the tire). Look for uneven wear across the tire’s width. Wear concentrated on the outer edges usually points to underinflation; wear down the center points to overinflation; wear on just one side is a classic alignment symptom. Check sidewalls for bulges or cracking, especially on tires more than five years old, and confirm the spare has air.
Brakes
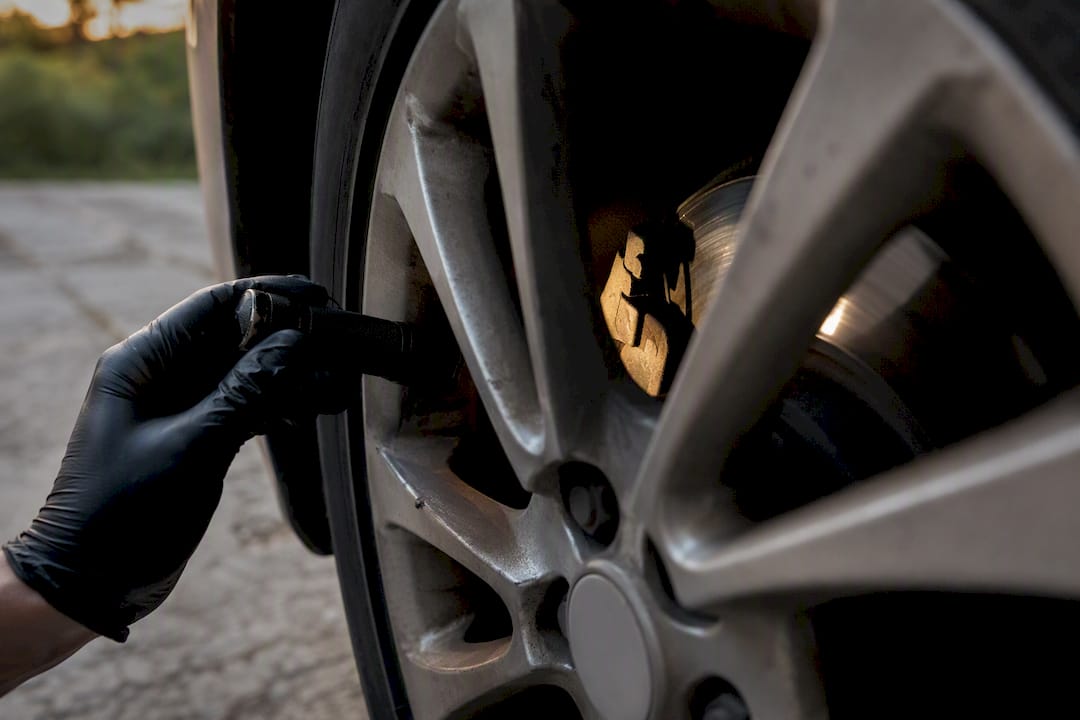
Press the pedal with the engine running. It should feel firm within the first inch or two of travel, not sink slowly toward the floor. Grinding or a metallic squeal under braking usually means the pads have worn past their wear indicator, and a soft or spongy pedal often means air or moisture has gotten into the brake lines. Pull a wheel if you’re comfortable doing so and check pad thickness visually. Anything under 3 millimeters (about 1/8 inch) needs attention soon. Our guide to inspecting brake pads at home walks through exactly where to look without removing the caliper.
Lights and visibility hardware
Have someone watch while you cycle through headlights (high and low beam), taillights, brake lights, turn signals, and hazards. A dim or flickering bulb often means a failing ground connection, not just a dying bulb. Check wiper blades for cracked rubber or streaking, and top off washer fluid. Inspect the windshield for chips or cracks in the driver’s direct sightline; those spread fast in cold weather and are cheap to fix now versus replacing the whole windshield later.
Seat belts and airbags
Pull each belt out fully and let it retract. It should lock immediately if you yank it hard, and the webbing shouldn’t show fraying or cuts. Buckle every belt and check that the airbag warning light on the dash comes on briefly at startup, then turns off. A light that stays on, or one that never illuminates at all, both signal a fault in the airbag system that needs a scan tool to diagnose properly.
Steering and suspension
With the engine off, grip the steering wheel and check for more than an inch or two of play before the wheels respond. Push down hard on each corner of the car and let go. It should settle back to level within one bounce; a corner that keeps bouncing means a worn shock or strut. Uneven tire wear, a car that pulls to one side, or a steering wheel that vibrates at highway speed are all suspension or alignment red flags worth a professional look.
Fluids and battery
With the engine cold, check oil level and color on the dipstick (it should be amber to light brown, not black and gritty), coolant level in the overflow tank, and brake, transmission, and washer fluid. Brake fluid gradually absorbs moisture over time, which lowers its boiling point and can quietly reduce braking performance long before a warning light appears. Check battery terminals for white or greenish corrosion buildup and make sure the cable clamps are tight. A battery over three years old that struggles to start the car on a cold morning is worth testing before it fails somewhere less convenient.
Belts and hoses
Squeeze the radiator hoses. They should feel firm, not mushy or brittle. Look at the serpentine belt for cracks, fraying, or a glazed shiny surface, all of which mean it’s due for replacement. A squeal on startup that fades after a few seconds is a common early sign of belt wear.
Exhaust and underbody
Walk around and look underneath for anything hanging loose, a muffler with rust-through holes, or fresh fluid drips on the driveway. A sudden increase in engine noise or a smell of exhaust inside the cabin points to a leak that needs prompt attention. Rotor issues sometimes show up here too as a rhythmic clicking noise; our brake rotor guide covers what that clicking usually means.
HVAC, horn, and safety devices
Run the defroster and confirm it clears the windshield within a few minutes. Test the AC for cold air and the heater for warm air. Sound the horn. Check that you have a working flashlight, jack, lug wrench, and a basic emergency kit in the trunk.
| System | What to check | Pass/fail cue | Next action |
|---|---|---|---|
| Tires | Tread depth, sidewall condition | Under 2/32 inch tread = fail | Replace tire before next drive |
| Brakes | Pedal feel, noise, pad thickness | Grinding or sinking pedal = fail | Book brake inspection immediately |
| Lights | All exterior bulbs cycle | Any bulb out = fail | Replace bulb or check fuse |
| Steering/suspension | Wheel play, bounce test | Wheel keeps bouncing = fail | Have shocks/struts inspected |
| Fluids/battery | Levels, color, terminal condition | Black gritty oil or corroded terminals = fail | Service fluids, clean or replace terminals |
Pro Tip: Shine a flashlight across the brake pad through the wheel spokes rather than trying to look straight on. The angled light makes the remaining pad thickness much easier to judge without pulling the wheel.
How to Perform the Inspection Step by Step
Park on level ground with the parking brake set and let the engine cool if you’re checking fluids. A consistent step order keeps you from missing items, which matters more than speed.
- Walk the exterior: lights, tires, glass, body damage
- Check tire pressure and tread on all four tires plus the spare
- Pop the hood: oil, coolant, brake fluid, belts, hoses, battery terminals
- Check interior: seat belts, horn, mirrors, dashboard warning lights at startup
- Start the engine, let it idle, and confirm no new warning lights appear
- Take a short road test: listen for noise, feel for pulling or vibration, test the brakes at low speed
Gather your tools before you start: a tire pressure gauge, a tread depth gauge or a penny, a flashlight, disposable gloves, and a basic socket set for pulling a wheel if needed. An OBD-II scanner is optional for most owners but useful if a dashboard light is on. It reveals stored trouble codes that don’t always trigger a visible warning during a short test drive.
Pro Tip: Never work near a running engine with loose sleeves, a scarf, or a hanging lanyard. Serpentine belts and cooling fans catch loose fabric fast and don’t stop when they do.
A quick 10 item check takes under 10 minutes. The full walkaround above runs 30 to 60 minutes depending on how comfortable you are pulling a wheel to check pads.
How Often You Should Run a Safety Inspection
Run the quick 10 point check regularly. Save the full system by system inspection for every three months or whenever you’re due for an oil change, since you’re already under the hood anyway. Practitioners generally recommend pairing a short monthly check with a deeper quarterly inspection, plus a pre-trip check before any long drive.
Certain events should trigger an inspection regardless of schedule:
- A new noise, vibration, or smell that wasn’t there before
- Any dashboard warning light, even one that turns off on its own
- Visible fluid spots under the vehicle
- Uneven tire wear noticed since the last check
- After a collision, even a minor one
- After a failed state inspection or a hard pothole hit
Following your owner’s manual’s mileage-based service intervals still matters alongside these visual checks. Timing belts, transmission fluid, and coolant flushes run on schedules a walkaround can’t catch.
State Inspections vs. Your Personal Checklist
A DIY checklist and a state safety inspection serve different purposes, and confusing the two leaves gaps. Some states require an annual licensed safety inspection for registration renewal, performed by certified technicians using calibrated equipment, and it typically covers steering, brakes, lighting, tires, and exhaust.
Your personal checklist is broader in intent but not a legal substitute. It’s built for early detection between service visits, not compliance. A licensed inspector checks against fixed legal thresholds; you’re mainly watching for anything trending toward failure before it becomes dangerous or expensive.
Use your own checklist to prepare before a state inspection appointment. Fixing an obvious burnt out bulb or worn wiper blade beforehand often means passing on the first visit instead of paying for a second trip. Rules vary meaningfully by state, so confirm your local requirements with your state’s DMV rather than assuming your neighbor’s rules apply to you.
- DIY checklist: frequent, informal, focused on early warning signs
- State inspection: annual, formal, performed by licensed technicians, tied to registration
- Overlap: brakes, lights, tires, steering are checked in both
What to Do When You Find a Safety Defect
Not every finding demands the same urgency. Sort what you found into two buckets before deciding your next move.
Stop driving immediately for: brake failure or a pedal that sinks to the floor, major steering play or looseness, a tire with cords visible or a sidewall bulge, or heavy fluid loss under the car. Tow the vehicle or have it inspected before driving further.
Safe to schedule for: a burnt out bulb, low washer fluid, a minor windshield chip outside the driver’s sightline, or a slightly worn wiper blade.
- Photograph the issue and note the odometer reading and date
- Write down exactly when the symptom started and under what conditions (cold start, highway speed, braking)
- Note any dashboard codes or warning lights, even ones that cleared themselves
- Call your shop with those specifics rather than a vague description
Telling a technician “grinding noise from the front right, started three days ago, gets louder above 30 mph” gets you a faster, cheaper diagnosis than “it’s making a weird noise.”
Why Trust This Checklist
Tom’s B & M Auto has run full service auto repair in Lynnwood since 1985, and this checklist reflects the same system-by-system logic our ASE-certified technicians use on the shop floor, adapted for a driveway instead of a lift. Where a finding needs more than a flashlight, our OBD-II diagnostics catch stored fault codes a visual check can’t. Every repair we perform carries a 24-month, 24,000-mile warranty.
DIY checks handle most visible and functional issues well. Anything involving brake fluid condition, alignment angles, or a persistent dashboard light is worth a professional look with proper equipment.
- Steering, suspension, or brake concerns: professional inspection recommended
- Bulbs, fluid top-offs, wiper blades: safe for most owners to handle
- Persistent warning lights: needs a scan tool, not guesswork
A Technician’s Take on DIY Inspections
The most common mistake I see is owners judging brake pads by sound alone and waiting for the squeal. By then the pads are often already scoring the rotor. Look at the pad thickness through the wheel spokes every month instead of waiting to hear something.
The second thing people skip: brake fluid condition. It doesn’t have a dipstick most drivers check, and moisture buildup inside the lines won’t show up as a dashboard light until braking performance has already dropped.
Pro Tip: If your brake fluid hasn’t been flushed in over two years, get it tested. It’s a five-minute check that catches a problem long before the pedal starts feeling soft.
Free Pre-Trip Safety Checks and Repairs in Lynnwood
Finding a defect on your own checklist is useful right up until it requires a lift, a scan tool, or a torque wrench calibrated to spec, and that’s where Tom’s B & M Auto picks up where your driveway inspection leaves off. We offer a free pre-trip safety check that covers the same systems on this list, documented and verified with professional equipment rather than a flashlight.
If your checklist turned up a soft brake pedal, a warning light, or worn pads, our technicians can confirm the diagnosis the same day in most cases and quote the repair before any work starts. We also run a free visual brake inspection for anyone unsure whether what they found needs immediate attention. Larger repairs come with financing options so an unexpected brake or suspension job doesn’t have to wait. Every repair carries our 24 month, 24,000 mile warranty, and same-day appointments are often available for Lynnwood area drivers. Call the shop or book your free pre-trip check online before your next long drive.
Frequently Asked Questions
How long does a full car safety inspection checklist take to complete?
A thorough system-by-system inspection takes 30 to 60 minutes for most owners. The quick 10 point version covering tires, lights, brakes, and fluids takes under 10 minutes and is worth doing monthly.
What’s the difference between a personal auto safety checklist and a state inspection?
A personal checklist is informal and focused on early detection between service visits. A state inspection is a formal, legally required check performed by licensed technicians in states that mandate it, typically covering steering, brakes, lighting, tires, and exhaust for registration renewal.
What tools do I need to inspect a car myself?
A tire pressure gauge, a tread depth gauge or a penny, a flashlight, disposable gloves, and a basic socket set cover most checks. An OBD-II scanner is optional but useful for reading stored fault codes tied to a dashboard warning light.
What should I do if I find a serious safety defect during my inspection?
Stop driving the vehicle if you find brake failure, major steering play, severe tire damage, or heavy fluid loss. Document the issue with photos and notes, then call a shop with specific symptoms rather than driving it in for a vague diagnosis.
How often should I run a car maintenance checklist versus a full safety check?
Run the quick check monthly and the full system by system checklist every three months or at each oil change. Add a pre-trip check before long drives and after any collision, hard pothole hit, or severe weather event.
Sources
For readers who want the regulatory or technician-level detail behind this checklist, these sources go deeper than a driveway inspection can.
- NCDOT – Safety inspections
- CVSA — International Roadcheck Vehicle Inspection Cheatsheet
- Motor Advises — Car Safety Inspection Checklist: 10-Step Safety Guide
Recommended
- Brake System Components Checklist: Your Safety Guide – Tom’s B & M Auto Blog
- Shop Safety Checklist for Mechanics: 2026 Guide – Tom’s B & M Auto Blog
- Seasonal Car Maintenance Checklist for Every Season – Tom’s B & M Auto Blog
- Check Engine Sign in Car: What to Do Right Now – Tom’s B & M Auto Blog
Leave a Reply