
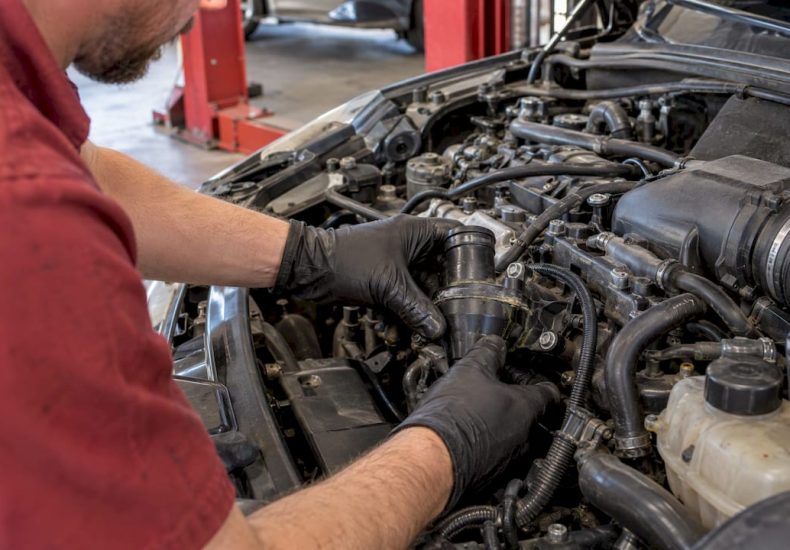
MINI Thermostat Housing Leak: Signs, Causes and Repair
A MINI thermostat housing leak almost always comes down to a plastic housing that has cracked or a seal that has given up after years of heat cycling. The fix is to replace the housing, usually with the water pump or coolant pipe that sits beside it, then refill and bleed the system properly. Until then, keep the car parked or drive it only a short distance with the coolant level watched, because a cooling system that cannot hold pressure overheats quickly.
This guide covers what the leak looks like, why MINI housings fail, how a shop confirms the source, what the repair involves and what to check afterward. If you are in the Lynnwood, WA area, we can look at the car with you.
TL;DR
- Coolant puddles at the front of the engine, a rising temperature gauge, a sweet smell and weak cabin heat are the classic signs of a leaking thermostat housing.
- The plastic housing on many MINI Cooper engines cracks from repeated heat cycles, and the housing often sits right against the water pump, so the two are commonly replaced together.
- A cooling-system pressure test, after cleaning the area, tells a shop whether the leak is at the housing, a hose clamp or somewhere else.
- A cracked housing needs replacement, not a patch. After the job, the system must be bled and pressure-tested so air pockets do not cause overheating.
- Stop driving if the gauge climbs. Overheating can turn a housing repair into an engine repair.
Table of Contents
- What a leaking thermostat housing looks like
- Why MINI thermostat housings leak
- Is it the housing or something else?
- Gasket or full replacement?
- What the repair involves
- After the repair: confirming the leak is gone
- Can you drive with a leaking housing?
- Promo: have us look at your MINI in Lynnwood
- Perspective from our shop
- FAQ
- Sources
What a leaking thermostat housing looks like
The thermostat housing is the part that holds the thermostat and connects coolant hoses or pipes to the engine. When it leaks, you tend to notice it in a handful of ways:
- Coolant on the ground or on the engine. Drips or a puddle toward the front of the car, or crusty white or colored residue around the housing. On the R56 generation, the residue is often visible on top of the gearbox, because the housing sits at the gearbox end of the engine.
- A falling coolant level. The reservoir keeps needing top-ups with no obvious reason.
- A sweet smell after you park, from coolant hitting hot metal.
- Temperature gauge changes. It runs hotter than usual, or swings up and down instead of settling at its normal position after warm-up.
- Weak heat inside the cabin, because low coolant or trapped air starves the heater core.
- Warning lights. A coolant-level or temperature warning, or a check engine light.
None of these points to the thermostat housing alone. A leaking hose, radiator, water pump or even a head gasket can look similar. Our guide to radiator leak symptoms helps you compare, and if you are losing coolant but cannot find any wet spots, read about coolant loss with no visible leak.
Why MINI thermostat housings leak
The short answer is plastic plus heat. Several MINI engines use a plastic housing that sees the full swing from cold start to operating temperature thousands of times.
R56 (2007 to 2013 Cooper and Cooper S)
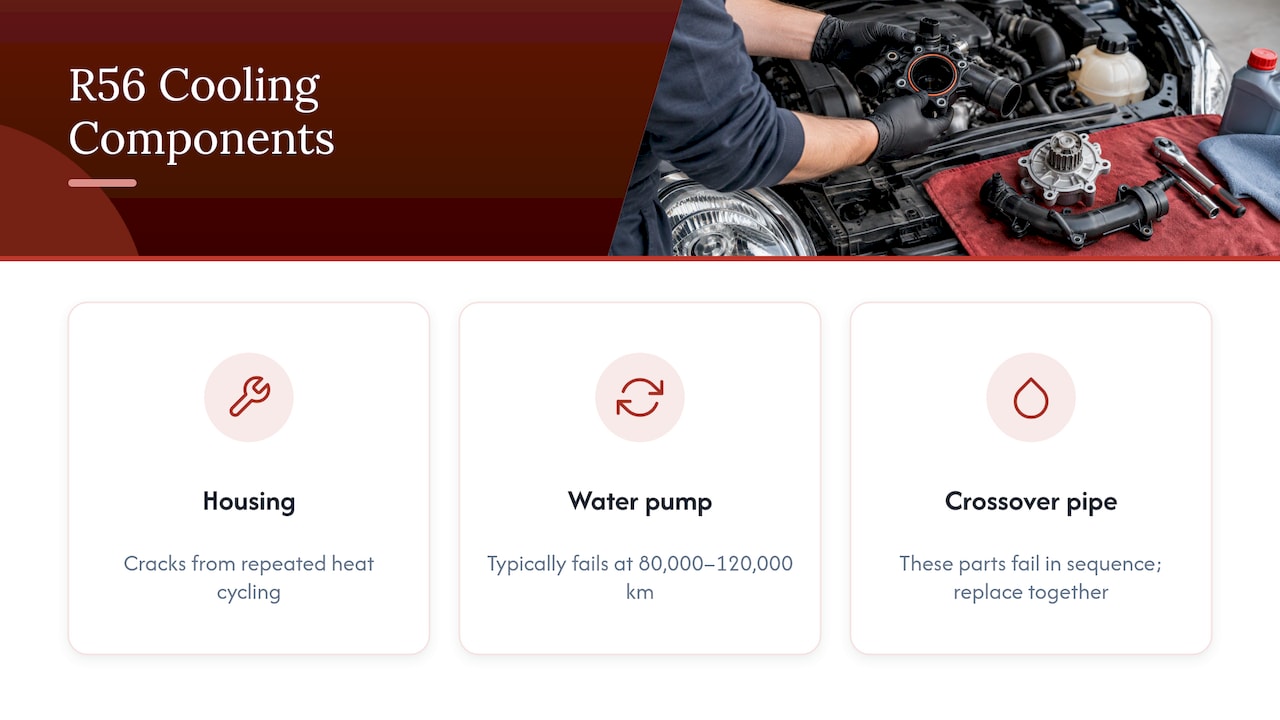
On the R56, the plastic thermostat housing sits close to the exhaust manifold and cracks from repeated heat cycling, which lets coolant seep out. The same report notes that the water pump also has a plastic housing and typically fails between 80,000 and 120,000 km (roughly 50,000 to 75,000 miles). It recommends replacing the pump, thermostat housing and coolant crossover pipe together, since these parts tend to fail in sequence.
The N18 turbo engine in the Cooper S
Owners of later cars with the N18B16A engine see the same pattern. One engine reference calls the plastic housing’s tendency to crack and leak a very common problem on that engine.
F56 (2014 and later)
On the F56 with the B38 three-cylinder, the plastic housing is prone to cracking from temperature cycling, and the belt-driven coolant pump sits directly against it. Because the two are neighbors, they are usually replaced as a unit. The same source lists labor of roughly 3 to 6 hours for the combined housing and pump job, which is why a bill for this repair can surprise owners who expected a simple part swap.
Other causes of a leak at the housing
Not every leak is a cracked housing. A seal or O-ring can harden, a hose clamp can loosen, and a leak that appears right after other work sometimes comes from a hose that was disturbed and not reseated. If a leak shows up after a recent service, tell the shop when the work was done.
Is it the housing or something else?
Coolant runs downhill and sprays around, so the place where you see the drip is rarely the place it starts. A careful diagnosis follows a sequence rather than a guess.
- Clean the area first. Wipe or degrease the housing and the surrounding hoses so fresh coolant is easy to see.
- Find the highest wet point. One diagnostic guide explains that if coolant appears at the housing seam, the gasket or housing is the likely culprit, while a leak that starts at a hose end or clamp points to the hose connection.
- Pressure test the cooling system. With the engine off and cool, the tester pressurizes the system to the pressure marked for your vehicle. That can reveal seepage at the gasket line, a clamp or a hairline crack that does not show up with the engine running. The same guide treats it as one of the best ways to pinpoint a housing leak. A pressure drop of more than about 2 psi over 5 minutes suggests a significant leak that needs to be located.
- Dye test if needed. A UV dye added to the coolant helps trace a slow weep that is hard to see.
- Rule out the neighbors. The water pump, crossover pipe, radiator, expansion tank and heater hoses all get checked before parts are ordered.
A test drive adds clues. According to MOTOR, when and where a car overheats points to which of coolant level, pressure, flow or airflow is lacking. A car that runs normally at highway speed but heats up in traffic might have a fan problem, not a housing problem.
If you see milky oil, oil floating in the coolant or persistent bubbling in the reservoir, that is a different conversation. See our articles on oil in coolant, coolant reservoir bubbling and head gasket symptoms.
Gasket or full replacement?
This is the question owners ask most. The answer depends on what has failed.
- Seal or gasket only. If the housing itself is intact and only the seal or O-ring has hardened or been misseated, a new seal can stop the leak.
- Cracked housing. A crack in plastic does not seal with a new gasket. The housing has to be replaced.
- Housing next to a high-mileage pump. Because the pump and housing share the same area and the labor overlaps, replacing both at once avoids paying for the same teardown twice. On the R56 the crossover pipe is part of the same recommendation.
A shop can tell you which situation you have once the housing is exposed and the cooling system has been pressure tested. We would rather show you the cracked part or the pressure result than ask you to decide blind.
It also helps to replace the thermostat inside the housing when the housing comes off, since you are paying for the access anyway. Our explanation of the role of the thermostat in your engine shows what it does and why a stuck one causes overheating even when nothing leaks.
What the repair involves
The exact steps differ by engine, but the job on a 2007 to 2013 Cooper S gives a good picture of the process:
- Remove the components that block access to the housing.
- Drain the coolant.
- Disconnect the wiring and hoses attached to the housing.
- Clean the mating surface so the new part seats flat.
- Lubricate the O-ring, connect the water pipe and install the housing with the thermostat.
- Tighten the bolts to specification. One published procedure for this generation lists 8 Nm for the housing bolts, which is light enough that overtightening can crack a plastic part.
- Refill with the correct 50/50 coolant mixture and bleed the air out through the bleeder screw.
- Warm the engine while watching temperature, let it cool, top off and road test.
The torque figure is a good example of why this job is better done with the right tools and a service procedure for your specific car. Plastic parts, tight access and an air-sensitive cooling system leave little room for error.
If you are comparing quotes, ask what is included: housing, thermostat, seals, pump and pipe if recommended, new coolant, bleeding and a pressure test. A low number that leaves out the refill and test is not the same job.
What it can cost
Parts and labor depend on the engine and on whether the pump and pipe go in at the same time. Published figures for the F56 B38 housing and pump assembly are in euros and for European markets, so they are no guide for a Lynnwood bill. Owner forums show US dealer quotes well above what many owners expect. We do not publish a price for this repair, because it depends on the car, the parts and what the inspection finds. Contact us with your model year and engine and we will explain what applies to your car.
After the repair: confirming the leak is gone
The repair is not finished when the new housing is bolted on. A good shop verifies in stages. One diagnostic guide describes four phases:
- Cold fill check. Refill and look for drips before the engine ever starts.
- Pressure test. Confirm the seals hold pressure without engine heat.
- Hot run. Bring the engine to full operating temperature while watching for leaks.
- Air bleed. Remove trapped air that could cause false readings or overheating.
Pressure matters because it keeps coolant from boiling. MOTOR explains that a pressure of 5 to 15 psi does the real work, and each psi raises the boiling point by about 3 degrees. If the system cannot hold pressure, coolant boils in the cylinder head and the engine overheats fast.
Over the next week or two at home:
- Check the coolant level in the reservoir when the engine is cold, never with a hot cap off.
- Look under the car in the morning for fresh drips.
- Watch the temperature gauge. It should come up to its normal spot and stay there.
- Confirm the cabin heater blows hot. Cold heat after a repair often means air is still in the system.
If the level drops again, or the gauge climbs, bring the car back. Our guide to why engines overheat lists the other usual suspects.
Can you drive with a leaking housing?
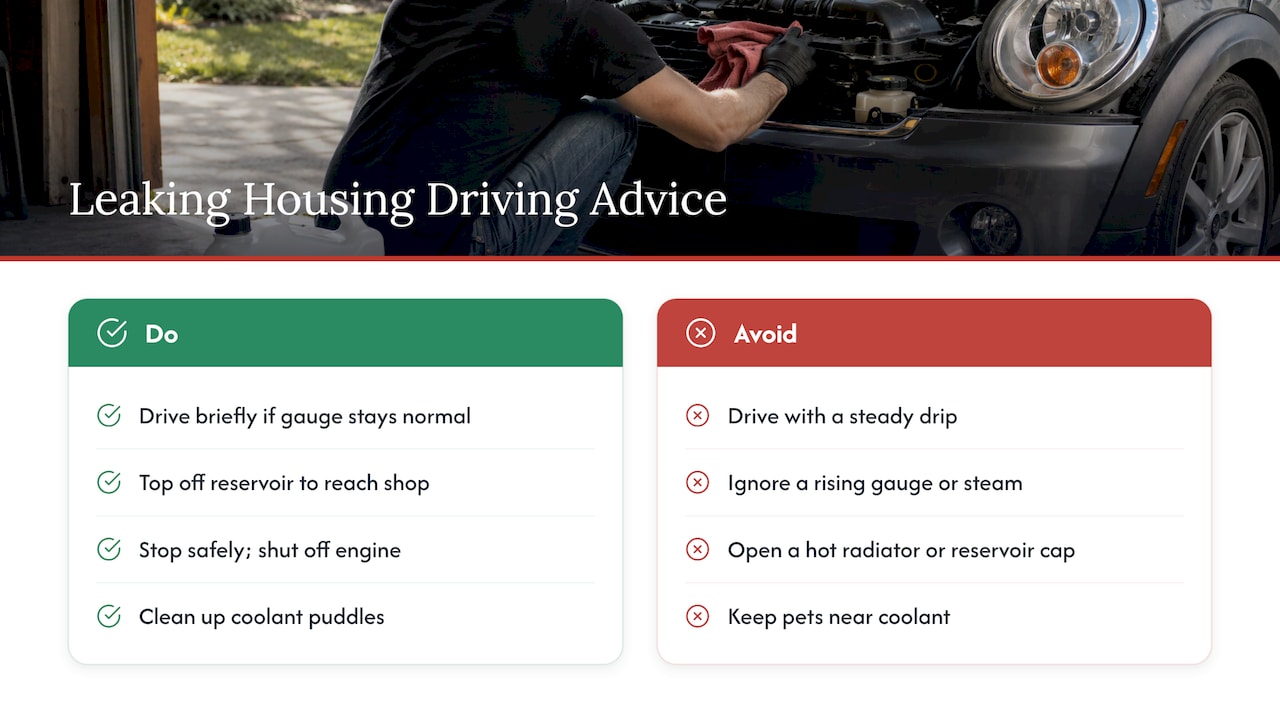
Only briefly, and only if the gauge stays normal. A small seep may let you reach a shop with the reservoir topped off. A steady drip, a gauge moving past normal, steam from under the hood or a coolant warning means stop in a safe place and shut the engine off. Never open the radiator or reservoir cap on a hot engine, because the system is under pressure and hot coolant can spray out. Coolant is also toxic to pets, so clean up puddles.
Towing is cheaper than a warped cylinder head. If you are not sure, call us before you drive.
Promo: have us look at your MINI in Lynnwood
We have been a family-owned shop in Lynnwood since 1985. Our ASE-certified technicians service all makes, including European vehicles, and we use professional-grade diagnostics and digital inspections. We quote upfront, and our work carries a 24-month / 24,000-mile warranty. Same-day appointments are often available. We also offer discounts for military, seniors and first responders.

For a coolant leak, we start with a cleaned engine bay and a cooling-system pressure test, then show you what we find before any repair starts. Book an engine repair appointment in Lynnwood or see everything we do on our main site. While the car is in, you can pair the visit with an oil change, from $100, so you only make one trip.
Perspective from our shop
When a MINI comes in with a coolant leak, the housing is the first place we look, but never the only place. The plastic parts around it age together, so we check the pump, the pipe and the hoses before we write the estimate.
Our approach is simple. We pressure test, we find the source, and we explain what failed and why. We prefer to replace the housing and its neighbors in one visit when the inspection supports it, because that saves you paying for the same labor twice and gives you one warranty on the whole job.
Cooling problems punish delay. A small seep today is a tow tomorrow. Catching it early, with a proper bleed and a pressure test at the end, is how you keep a small repair small. Our 24-month / 24,000-mile warranty covers the work, so you are not left guessing after you drive away.
Shingi
FAQ
How do I know the leak is the thermostat housing and not the water pump?
The two sit side by side on many MINI engines, so it is easy to mix them up. A shop cleans the area, pressure tests the system and traces the leak to its highest wet point. Often both parts are replaced together because of how close they are.
Can I fix a thermostat housing leak with stop-leak?
We do not recommend it. A cracked plastic housing needs to be replaced, and additives can clog small passages in the radiator and heater core. If coolant is dripping, have the cooling system pressure tested instead.
How long does the repair take?
It depends on the engine. Published labor estimates for the F56 housing and pump job run from 3 to 6 hours. Bring the car in early in the day and ask whether the pump and pipe should be done at the same time.
Is it safe to keep driving with a small leak?
Only for a short trip to a shop, with the coolant topped off cold and the temperature gauge in view. If the gauge rises, pull over and shut the engine off. Overheating can damage the cylinder head, which costs far more than the housing.
Do you work on MINI Coopers?
We service all makes and models, including European vehicles. Call us with your year, model and engine so we can tell you what to expect before you come in.
Sources
- Mini Cooper R56 Reliability: Problems and Costs, Carchecker
- Mini Cooper F56 Reliability: Problems and Costs, Carchecker
- N18B16A Engine (Mini Cooper S), AutoHints
- Thermostat Housing Leak: Diagnose the Seal Problem Fast, VehicleRuns
- Diagnose and Fix Thermostat Housing Leak Problems, Carsymp
- Cooling System Diagnosis, MOTOR
- How to Replace Thermostat Housing 2007-13 Mini Cooper S, 1A Auto
Recommended
- Radiator Leak Symptoms: How to Spot One Early
- Coolant Loss With No Leak? Pressure Tests and Safe Home Checks
- $160–$700 to Fix? Valve Cover Gasket Leak Checks for Car Owners
- 5 Head Gasket Symptoms Car Owners Must Treat Now
Leave a Reply