
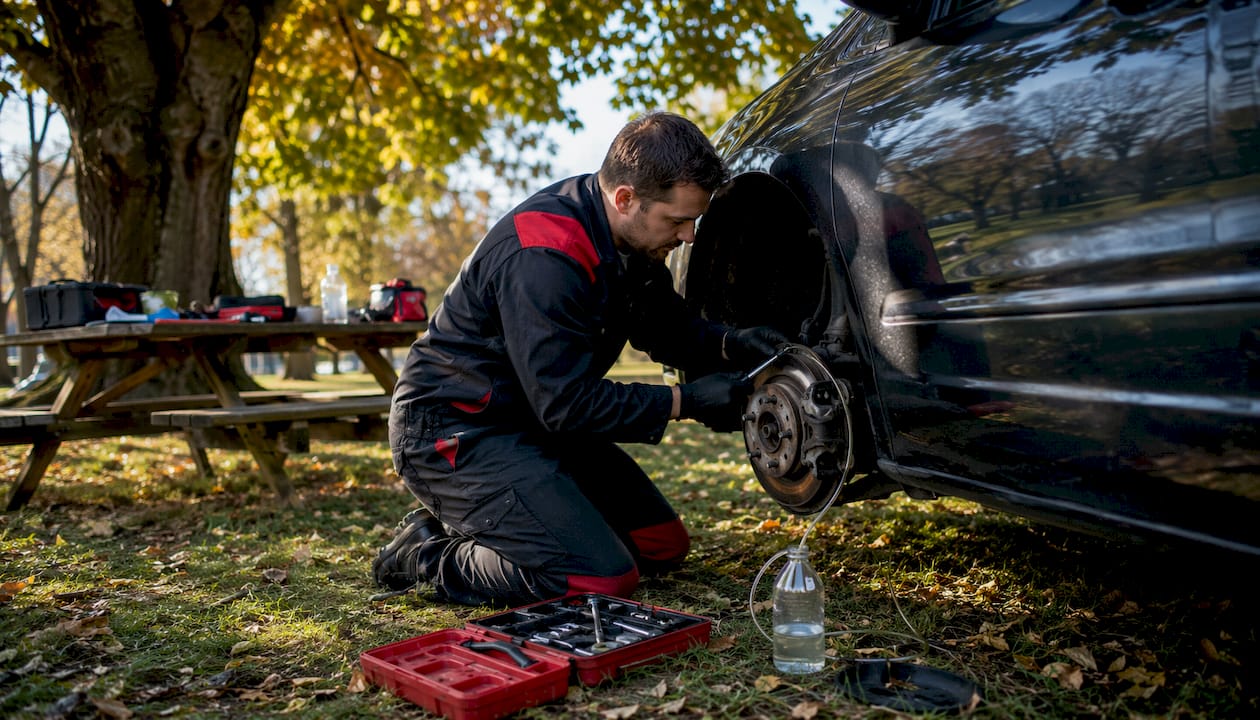
How to Bleed Brakes Without a Helper: Solo Methods
For most passenger cars, you can absolutely bleed brakes without a helper. The bottle/siphon method is the best starting point: low cost, reliable, and safe for one person working alone. If you want faster results and have an extra $30–$150 to spend, a hand vacuum pump kit gets the job done in 20–40 minutes. Gravity bleeding works too, but plan for a long afternoon.
Three rules before you touch a bleeder screw:
- Keep the master cylinder reservoir topped up at all times. Running it dry introduces fresh air and multiplies your work.
- Use a box-end wrench sized to the bleeder (commonly 8mm or 10mm). An open-end or adjustable wrench will round the nipple.
- Test pedal firmness before driving. A firm, non-spongy pedal is the only acceptable result.
Pro Tip: Before you open a single bleeder, check that you have the correct brake fluid type for your vehicle. DOT 3, DOT 4, and DOT 5.1 are not interchangeable, and using the wrong spec can damage seals.
Table of Contents
- How do you bleed brakes without a helper? Comparing solo methods
- What tools and parts do you need for a solo brake bleed?
- Step-by-step: the bottle/siphon method for one person
- How does gravity bleeding work, and when should you use it?
- Hand vacuum pumps and one-man bleeder kits: the fastest solo option
- What is the correct wheel bleeding order?
- Pro tips, common mistakes, and how to verify a successful bleed
- Key Takeaways
- When DIY has limits: a shop perspective
- Professional brake service at Tom’s B & M Auto in Lynnwood, WA
- Useful sources
How do you bleed brakes without a helper? Comparing solo methods
Three methods work reliably for single-person brake bleeding. Here is how they stack up:
| Method | Solo ease | Time estimate | Tool cost | Removes large air pockets | Air-introduction risk |
|---|---|---|---|---|---|
| Bottle/siphon | High | 45–90 min | Under $10 | Good | Low (tube stays submerged) |
| Gravity | High | 2–4 hrs (longer on trucks) | Under $5 | Fair to poor | Low if reservoir stays full |
| Hand vacuum pump | High | 20–40 min | $30–$150 | Excellent | Moderate (thread leaks) |
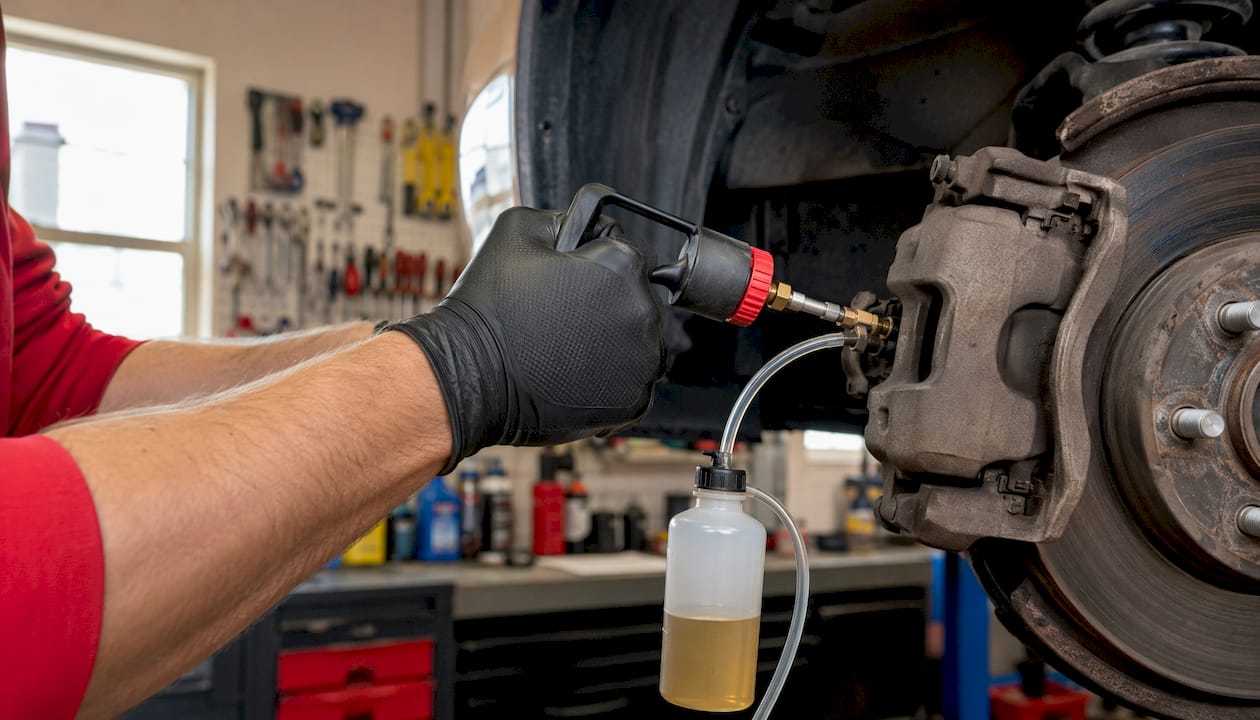
Which one to pick: If you have minimal tools, start with the bottle/siphon method. It costs almost nothing and handles most passenger-car jobs well. If you need speed or are dealing with a system that had a lot of air introduced (caliper replacement, open line), a vacuum pump is worth the investment. Gravity bleeding is a last resort for light-duty cars when you have time to spare.
Special cases where solo methods may fall short: heavy-duty trucks with large fluid capacity can make gravity and siphon methods impractically slow. Modern vehicles with ABS modules or brake-by-wire systems often need a scan-tool initialization after fluid exchange. Manual bleeding alone can leave pedal feel poor on high-end European vehicles that require module purges. When in doubt, check the service manual before you start.
What tools and parts do you need for a solo brake bleed?
You do not need a lot. Most of this is already in a basic garage or costs a few dollars at any auto parts store.
Essential items:
- Brake fluid matching your vehicle’s spec (check the reservoir cap or owner’s manual)
- Clear vinyl or aquarium tubing that fits snugly over the bleeder nipple
- A small catch bottle or jar (a clean mason jar works fine)
- A box-end wrench in the correct size, commonly 8mm or 10mm
- A floor jack, jack stands, and wheel chocks (never work under a car supported only by a jack)
- Nitrile gloves and safety glasses
- Rags and a can of brake cleaner for spills
Optional but worth having:
- A hand vacuum pump kit ($30–$150) for faster, more thorough bleeding
- A one-man bleeder kit with a check valve, which lets you pump the pedal without sucking air back in
- A brake pedal depressor (a piece of 1×4 lumber or a strap) if you want to use the pressure-cycling method alone
One safety note that gets skipped too often: brake fluid is corrosive to paint. Keep rags handy, and if you spill any on a body panel, rinse it off immediately with water. Dispose of used fluid at a recycling center or auto parts store. Do not pour it down a drain.
For readers with upgraded calipers or multi-piston setups, the brake upgrade guide at FrenzyCars covers how system differences affect bleeding procedures.
Step-by-step: the bottle/siphon method for one person
This is the recommended approach for most DIYers. The siphon effect created when the catch bottle sits below the bleeder and the tube end stays submerged generates a small but steady suction that sustains fluid flow without any pump.
Time estimate: 45–90 minutes for a full four-wheel bleed on a typical passenger car.
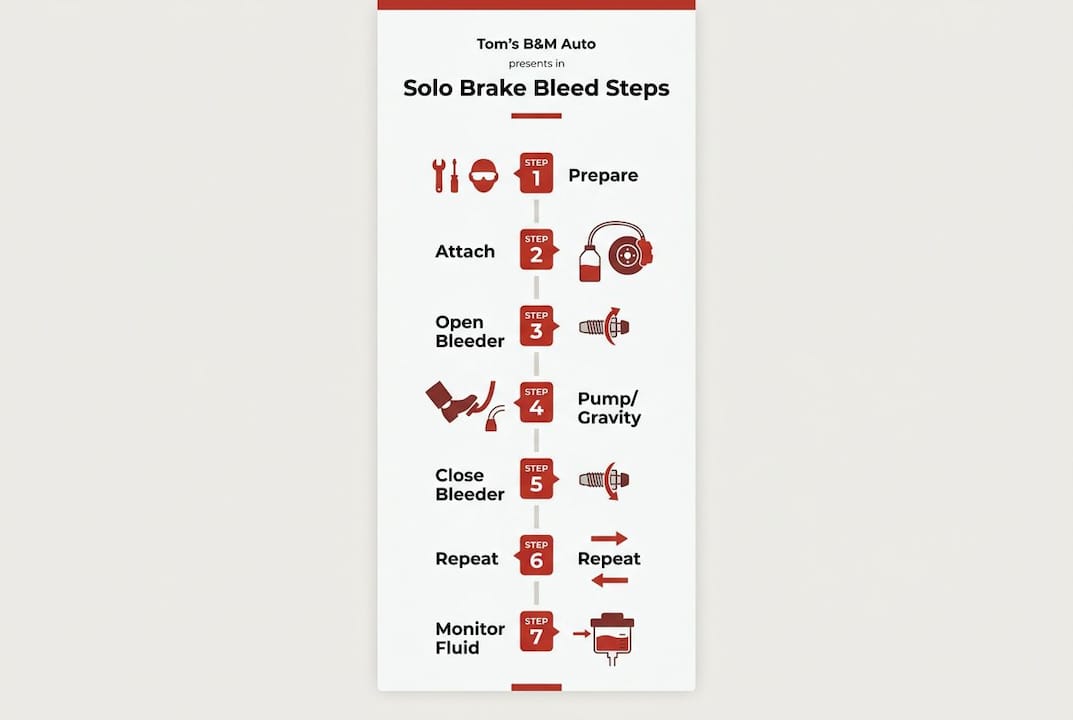
- Secure the vehicle. Park on a level surface, chock the wheels, jack it up, and set it on jack stands. Remove the wheels.
- Fill the master cylinder to the MAX line. Pop the hood, remove the reservoir cap, and top it off with the correct fluid. Keep the cap loose but on to reduce contamination.
- Cut your tubing to length. You need enough to reach from the bleeder nipple down to your catch bottle with a few inches of slack.
- Add an inch of fresh brake fluid to the catch bottle. This is what maintains the siphon. The tube end must stay submerged in fluid at all times.
- Slip the tubing over the bleeder nipple on the wheel furthest from the master cylinder (typically the right rear). Make sure it fits snugly.
- Place the catch bottle below the wheel level. The height difference is what drives the siphon.
- Crack the bleeder open about a quarter turn with your box-end wrench. Fluid should begin to flow.
- Watch the tubing. You will see old, dark fluid and air bubbles moving through. Keep checking the reservoir every few minutes and top it up before it drops below the MIN line.
- When the fluid runs clear and bubble-free, close the bleeder snugly. Do not overtighten.
- Move to the next wheel in sequence (see the wheel order section below) and repeat.
- Final check: pump the brake pedal several times with the engine off. It should feel firm and build pressure immediately. If it feels spongy, go another round.
Pro Tip: Top off the reservoir after every single wheel, not just at the end. Missing this step is the number-one reason DIYers have to start over.
Common failure points: letting the master cylinder run dry (introduces air instantly), not submerging the tube end in fluid (breaks the siphon and sucks air back), and closing the bleeder before the flow stops (traps residual air).
How does gravity bleeding work, and when should you use it?
Gravity bleeding is the simplest solo option. Open the bleeder, attach a tube to a catch bottle, and let the fluid drain on its own. No pumping, no vacuum. The physics are straightforward: the reservoir sits higher than the calipers, so fluid flows downhill when the bleeder is open.
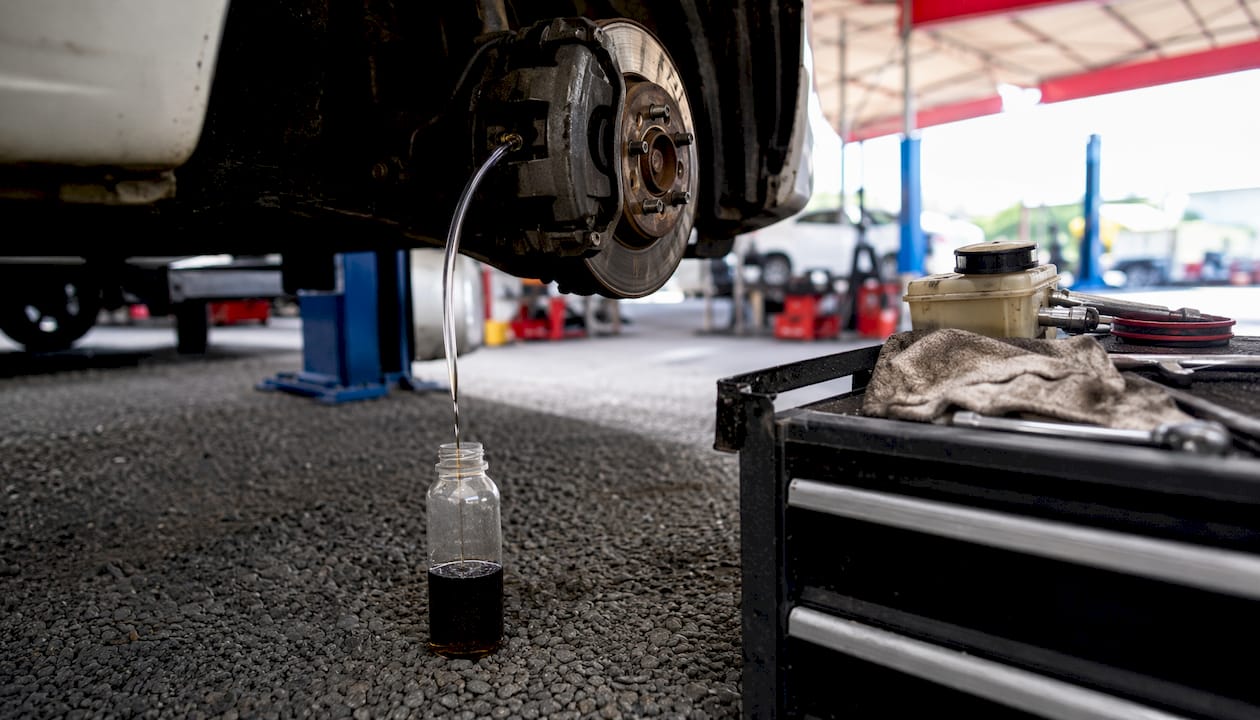
The catch is time. On a standard passenger car, expect to wait 15–30 minutes per wheel for a steady, bubble-free drip. On full-size trucks with large fluid capacity, gravity bleeding can take up to 45 minutes per wheel, making it a poor choice for bigger systems. It also struggles to dislodge large air pockets that are trapped in a caliper or ABS module.
Where gravity bleeding earns its keep is on light-duty cars when you are doing a routine fluid flush rather than chasing a spongy pedal after a caliper replacement. It is also a useful first pass to get fluid moving before switching to an active method.
Practical tips to improve results:
- Start at the wheel furthest from the master cylinder and work inward.
- Use clear tubing so you can actually see when bubbles stop.
- Check the reservoir every 5–10 minutes. It will drop faster than you expect.
- Give each wheel enough soak time. Rushing this method defeats the purpose.
Hand vacuum pumps and one-man bleeder kits: the fastest solo option
A hand vacuum pump attaches directly to the bleeder nipple. You crack the bleeder, pull the pump handle to create suction, and fluid flows from the reservoir through the lines and out the bleeder into a catch bottle. No pedal pumping required.
Good kits run in a cost range typical for such tools depending on quality and included adapters. The job typically takes 20–40 minutes for a full bleed, faster than either the bottle method or gravity. One-way valve kits (sometimes called one-man bleeder kits) work differently: they let you pump the brake pedal without sucking air back in when you release it, because the check valve prevents backflow. These are a solid middle ground between the bottle method and a full vacuum pump.
Steps for the vacuum pump method:
- Fill the master cylinder to MAX.
- Attach the pump tubing to the bleeder nipple on the furthest wheel.
- Crack the bleeder open a quarter turn.
- Pull the pump handle slowly to draw fluid through. Watch the catch bottle.
- Continue until no bubbles appear in the tubing for several strokes.
- Close the bleeder, release the vacuum, and move to the next wheel.
- Top off the reservoir between wheels.
One important caveat: vacuum pumps can draw air past imperfect bleeder threads, producing bubbles in the catch bottle even after the brake lines are clear. Do not keep pulling vacuum indefinitely trying to chase those bubbles away. The real test is pedal firmness, not what the tubing looks like. If the pedal is firm and the fluid coming out is clean, you are done regardless of minor thread-leak bubbles.
For performance vehicles where fluid type and bleeding procedures differ from standard passenger cars, the performance maintenance checklist at FrenzyCars is worth a look before you start.
What is the correct wheel bleeding order?
Start with the wheel furthest from the master cylinder and work toward the closest. On most front-engine vehicles with the master cylinder on the driver’s side firewall, that sequence is:
- Right rear (RR)
- Left rear (LR)
- Right front (RF)
- Left front (LF)
The reason this order matters: bleeding the closest wheel first risks pushing air bubbles from the far lines into lines you have already cleared. Working outward-to-inward keeps the air moving in one direction, toward the open bleeders.
That said, some manufacturers specify a different pattern. Always cross-check with your vehicle’s service manual before you start, especially on vehicles with diagonal split-circuit brake systems or rear-biased setups. ABS-equipped vehicles may also require a specific scan-tool procedure after the manual bleed to purge air from the hydraulic control unit. If your manual calls for something different from the standard RR-LR-RF-LF sequence, follow the manual.
Pro tips, common mistakes, and how to verify a successful bleed
Use the right wrench every time. A box-end wrench sized to the bleeder (8mm or 10mm on most vehicles) is non-negotiable. An open-end wrench or adjustable pliers will round the hex on the bleeder nipple, and a rounded bleeder is a much bigger problem than a spongy pedal. If a bleeder is stuck, apply penetrating oil the day before and tap the wrench lightly with a small hammer before forcing it.
Rotate the caliper to expose trapped air. On multi-piston calipers, air can hide in a pocket that is not at the highest point when the caliper is in its normal position. Slightly loosening the caliper bolts and rotating the caliper so the bleeder sits at the top can help dislodge stubborn trapped air. Re-torque the bolts before driving.
Do not pump the pedal to full travel repeatedly. Pushing the pedal all the way to the floor on an open system can force the master cylinder piston past its normal travel range, wearing seals or dragging debris into the fluid. Use a piece of 1×4 lumber under the pedal as a stop if you are using the pressure-cycling method alone.
Verify success before you drive. With the engine off, pump the pedal three to five times and hold it. It should feel firm and stay firm, not slowly sink toward the floor. Then start the engine and press the pedal again. If it feels solid and builds pressure immediately with minimal travel, you are done. A short, controlled stop at low speed in a safe area is the final confirmation. If the pedal still feels soft after two full passes through all four wheels, stop and get a professional diagnosis. Persistent sponginess after thorough bleeding often points to a failing master cylinder, a caliper that needs replacement, or an ABS module that needs scan-tool purging.
When to call a pro: soft pedal after multiple complete bleeds, any ABS warning light that appears after the job, electronic parking brake systems that require initialization, or any vehicle where the bleeder screws are corroded and at risk of snapping off. A broken bleeder in a caliper means caliper replacement.
For more on how caliper design affects where air gets trapped, the brake caliper overview on the Tom’s B & M Auto blog covers the mechanics in detail.
Key Takeaways
The bottle/siphon method is the most reliable way to bleed brakes without a helper on most passenger cars: low cost, low risk, and effective when you keep the master cylinder full throughout.
| Point | Details |
|---|---|
| Best solo method | Bottle/siphon gives the best balance of cost, reliability, and safety for most passenger cars. |
| Top safety rule | Never let the master cylinder reservoir run dry; doing so introduces air and restarts the job. |
| Vacuum pump advantage | A hand vacuum pump ($30–$150) cuts bleed time to 20–40 minutes but requires checking pedal firmness, not just tubing visuals, to confirm success. |
| Correct wheel order | Bleed furthest wheel first (typically RR → LR → RF → LF) to avoid pushing air into already-cleared lines. |
| Tom’s B & M Auto | For ABS module purges, brake-by-wire systems, or a persistent soft pedal, Tom’s B & M Auto’s ASE-certified technicians handle what solo methods cannot. |
When DIY has limits: a shop perspective
Some brake jobs genuinely need professional equipment. At Tom’s B & M Auto, the most common call-backs after a DIY bleed involve three scenarios: ABS modules with trapped air that manual bleeding cannot reach, brake-by-wire systems on newer vehicles that require electronic initialization before the pedal feels right, and heavy-duty trucks where the fluid volume makes solo methods impractically slow.
Modern European vehicles are a particular case. Many require a scan-tool-driven ABS module purge after any fluid exchange. Manual bleeding alone often leaves the pedal feeling soft on these cars, not because the lines have air, but because the hydraulic control unit does. That is not a DIY limitation, it is a system design reality. For guidance specific to European makes, the European vehicle brake service guide on the Tom’s B & M Auto blog walks through what those procedures involve.
The bottle/siphon method covered here works well for the majority of Toyota, Honda, Subaru, and domestic vehicles. Know where your vehicle falls before you start.
Professional brake service at Tom’s B & M Auto in Lynnwood, WA
Bleeding brakes solo is satisfying when it works. When the pedal stays soft after two full passes, or the job involves an ABS module, an electronic parking brake, or a caliper that needs replacement, professional service is the faster path to safe brakes.
Tom’s B & M Auto has served Lynnwood drivers since 1985. ASE-certified technicians handle the full brake bleed service: ABS scan, caliper inspection, fluid flush if needed, and a final pedal-feel verification before the car leaves the shop. All work comes with a 24-month / 24,000-mile warranty. Same-day appointments are often available.
Book a free digital vehicle inspection to get a professional assessment of your brake system before or after your DIY attempt. If the job turns out to need more than a bleed, a $50 off coupon on repairs over $300 is available for Lynnwood-area customers.
Useful sources
The following sources informed the procedures, safety rules, and technical claims in this article:
- Brake bleeding — Wikipedia: Background on all five bleeding methods, the physics of hydraulic pressure, and why air compresses where fluid does not. Supports the method overview and gravity-bleeding limitations.
- Phoenix Systems — The Physics of Pressure: How to Bleed Your Brakes Solo: Source for the siphon-effect explanation (0.5–1.0 psi suction), gravity-bleeding time estimates on heavy-duty trucks, and solo-method physics.
- Haynes Manuals — How to Bleed Brakes by Yourself: Vacuum pump cost range ($30–$150) and time estimate (20–40 minutes).
- R1 Concepts — How to Bleed Brakes: Vacuum bleeder thread-leak caveat (false bubbles), and one-way valve kit explanation.
- GeoBrakes — How to Bleed Brakes: Wheel bleeding order (furthest from master cylinder first) and the master-cylinder-dry warning.
- Jalopnik — Here’s How to Bleed Your Car’s Brakes By Yourself: Step-by-step solo procedure, pedal-feel verification, and reservoir top-off reminders.
- Car and Driver — How to Bleed Your Brakes: Box-end wrench sizing recommendation (8mm or 10mm) to avoid rounding bleeder nipples.
Recommended
- What Is Brake Bleeding? A Car Owner’s Guide – Tom’s B & M Auto Blog
- How to Inspect Brake Pads at Home: A Safe Guide – Tom’s B & M Auto Blog
- The Role of Brake Caliper in Vehicle Safety – Tom’s B & M Auto Blog
- How to Service a European Vehicle Brake System – Tom’s B & M Auto Blog
Leave a Reply